Ultra Racing Install
Well itís done, my Ultra Racing front strut bar and the rear anti-role bar are in. I have put this step-by-step install together so you can do it at home.
I would like to say thanks to the team at Ultra Racing for their support. Two thumbs up on your great products!
Front Strut bar
Take your time and donít rush, lie out your parts and plan to take one to two hours. There will be times where a second set of hands will come in very handy, so plan.
1. Place the strut bar over the locating holes that are already in your strut housing. You will see that they mate up nicely.
2. On the driver side you will see that a plastic bracket is not letting the strut bar seat flush with the housing. You will need to make the bracket, I used a grease pencil where I needed to grind away.
3. Unbolt the bracket and carefully grind away the area you marked. Place the bracket back in place, but do not tighten down. Test fit the strut bar to see if it seats flush. If everything fits then bolt the bracket down tightly.
4. Ok this is where you are going to need a second set of hands and it helps if theyíre small.
5. Take a supplied bolt and washer and reach up your wheel-well. By just using feel slide the bolt through the mounting hole in your strut tower. The second person will place the Strut bar over the bolt you are holding in place and carefully place a nut over the bolt. This is where small fingers will help, itís a tight fit where the nut goes.
6. Hand tighten only, repeat step #6 for other side.
7. Tighten down the nuts and wipe clean, job is done.
Rear Anti-role Bar
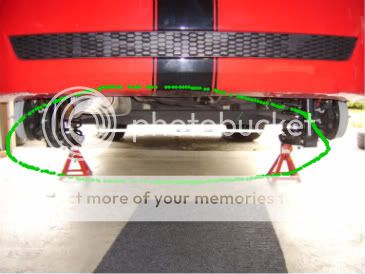
1. Take your time and donít rush, lie out your parts and plan to take two to three hours. You are going to need a spring compressor, jack-stands and a jack for this job.
2. Jack up the rear of the car and place one jack-stand on either side of the body, us the factory recommended positions. Give your self a comfortable working height.
3. Pull off both rear wheels.
4. Using a spring compressor, compress the rear spring on one side.
5. Remove the bolt that holds the rear shock in place, this will allow the rear end to drop. Gently remove the spring and rubber mounts.
6. Place in the mounting ring and bolts that are supplied.
7. Take the Anti-role bar and tie it to the underside of the rail. This will help support the Bar and make it easier to mount.
8. Hand tighten the bar to the mounting bolts, this will align the mounting bracket.
9. Tighten down the free third bolt on the mounting ring to hold it in place and then remove the bar again. (it will be in the way when mounting the spring back in.
10. Replace the rear spring and reattach the shock first, before decompressing the spring.
11. Now swing over to the other side and repeat steps 4 through 10.
12. Attach the Anti-role bar to the mounting bolts on either side, hand tighten only. If everything mates up (which it should), go a head and tighten.
So thatís pretty well it for the install. I hope this will help you out.


 LinkBack URL
 About LinkBacks
 Red Max


 Reply With Quote
 OneManJam

 Rescued Aveo
 2004 Chevrolet Aveo
 Daug's Aveo