Aveo 2.0L Turbocharged
-
Reddemonx92
- Posts: 629
- Joined: Sun Sep 13, 2009 9:16 pm
- Location: Orlando, FL
Re: Aveo 2.0L Turbo [DSM Injectors Pics!]
Very nice cant wait to see the install pics coming up
-
one_man_jam

- Posts: 169
- Joined: Mon Sep 14, 2009 11:08 am
- Location: Flagstaff, AZ
Re: Aveo 2.0L Turbo [DSM Injectors Pics!]
Reddemonx92 wrote:Very nice cant wait to see the install pics coming up
yes indeed
best of luck good sir


Re: Aveo 2.0L Turbo [DSM Injectors Pics!]
Omg omg take lots of pics
2004 Suzuki Swift+S (Adventure Vehicle/Winter Car)
2008 Mitsubishi Galant (Daily driver/Highway Boat)
2008 Mitsubishi Galant (Daily driver/Highway Boat)
Re: Aveo 2.0L Turbo [DSM Injectors Pics!]
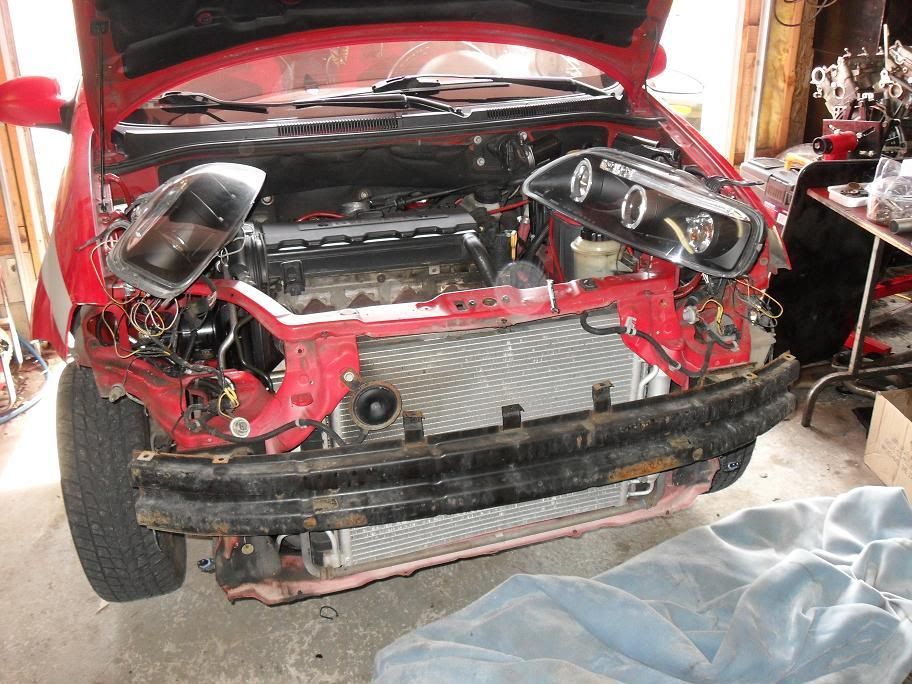
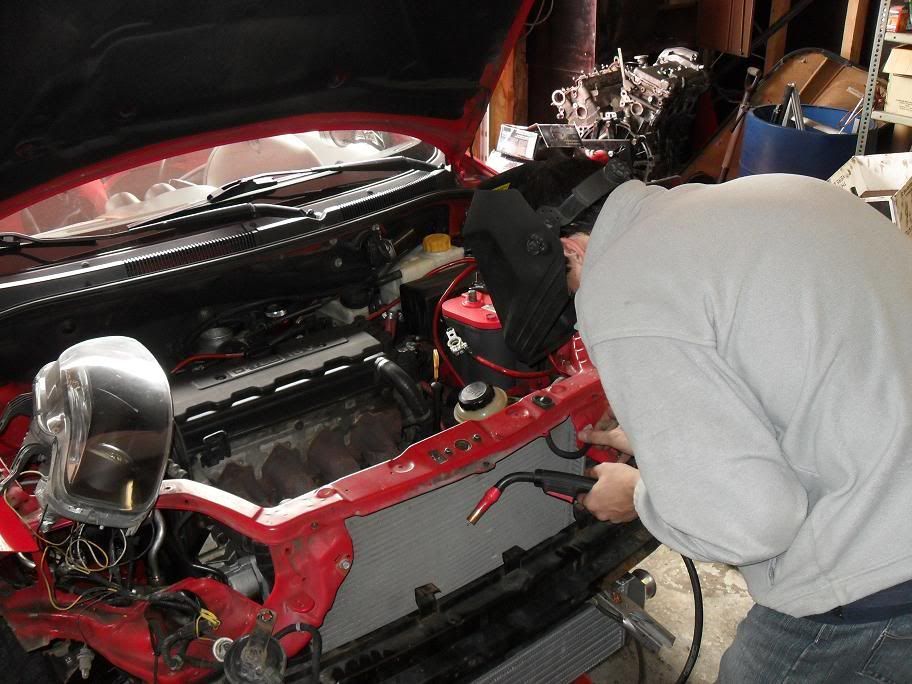
Day went a little slower then I hoped it would. I had to run to the store several times but hey hickups happen when doing a project like this!
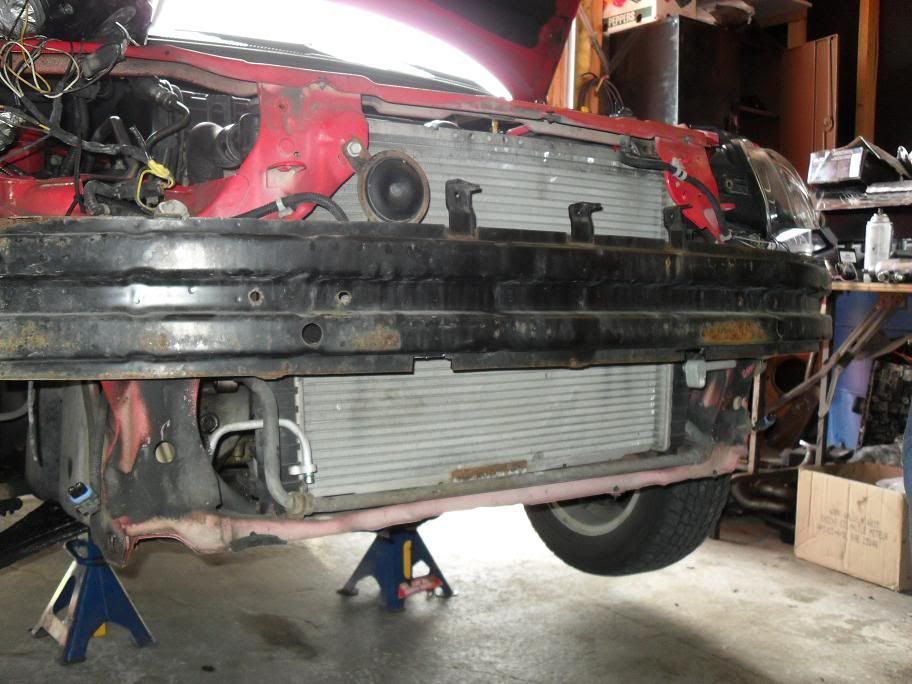
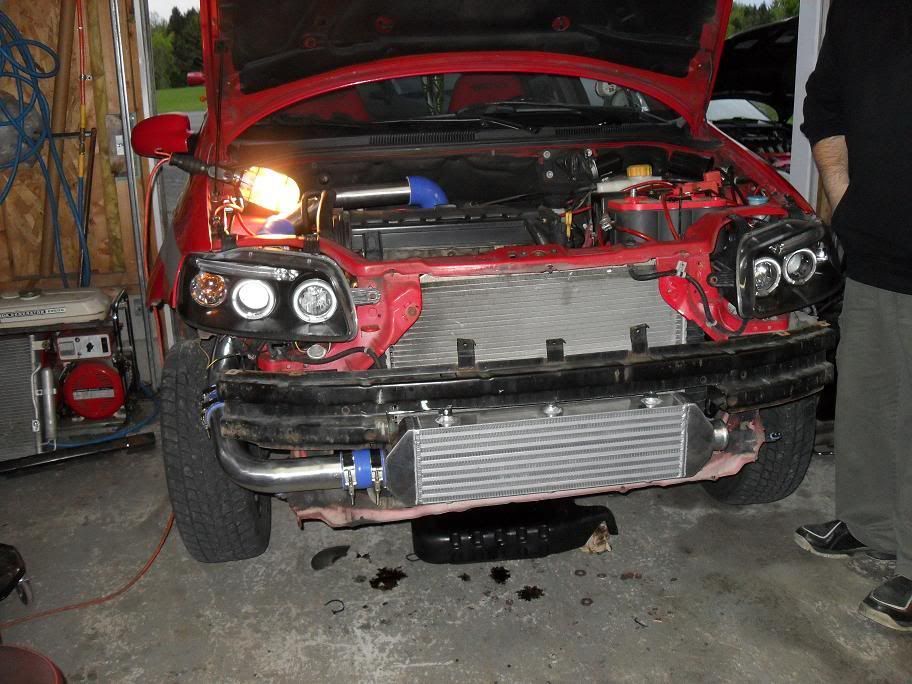
- Front bumber removed
- Air Conditionner radiator removed (Don't have A/C anymore)
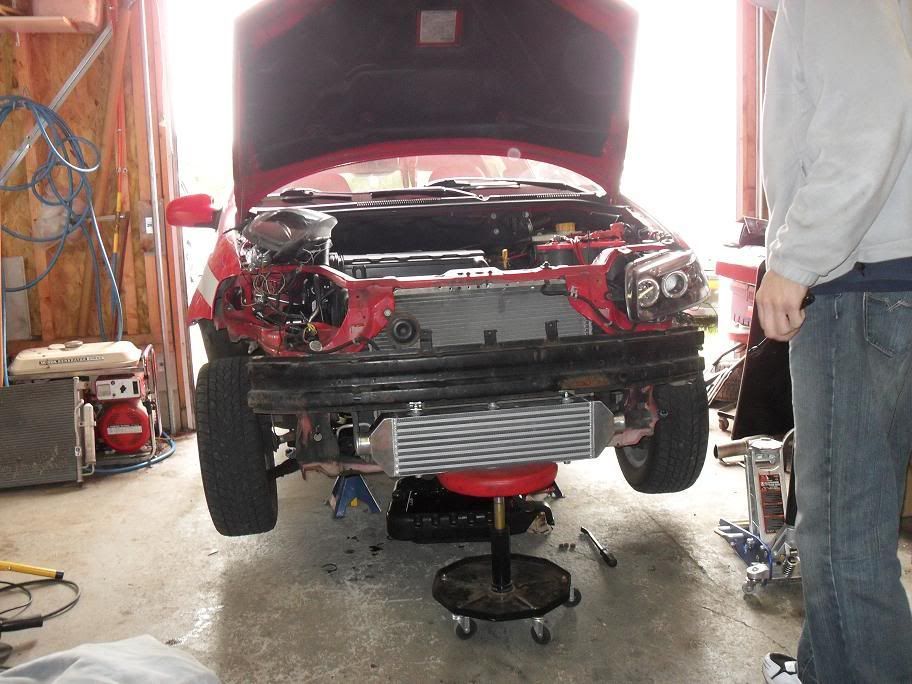
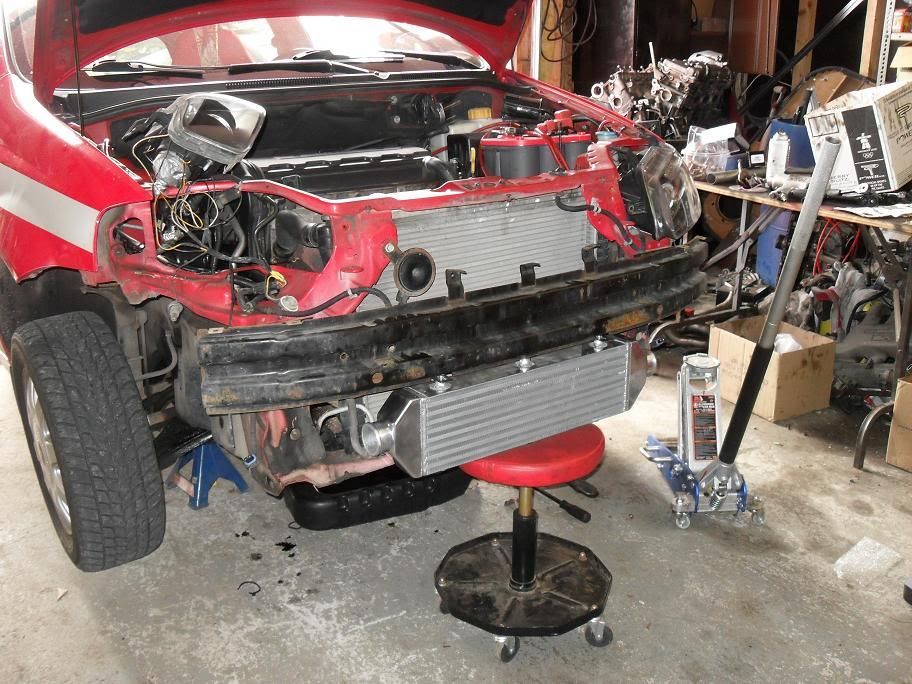
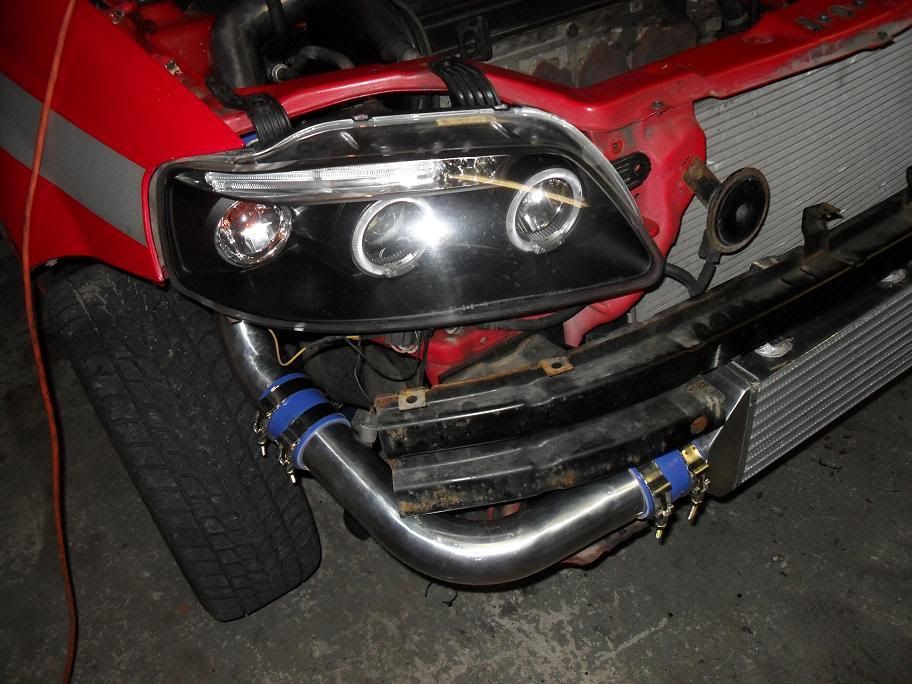
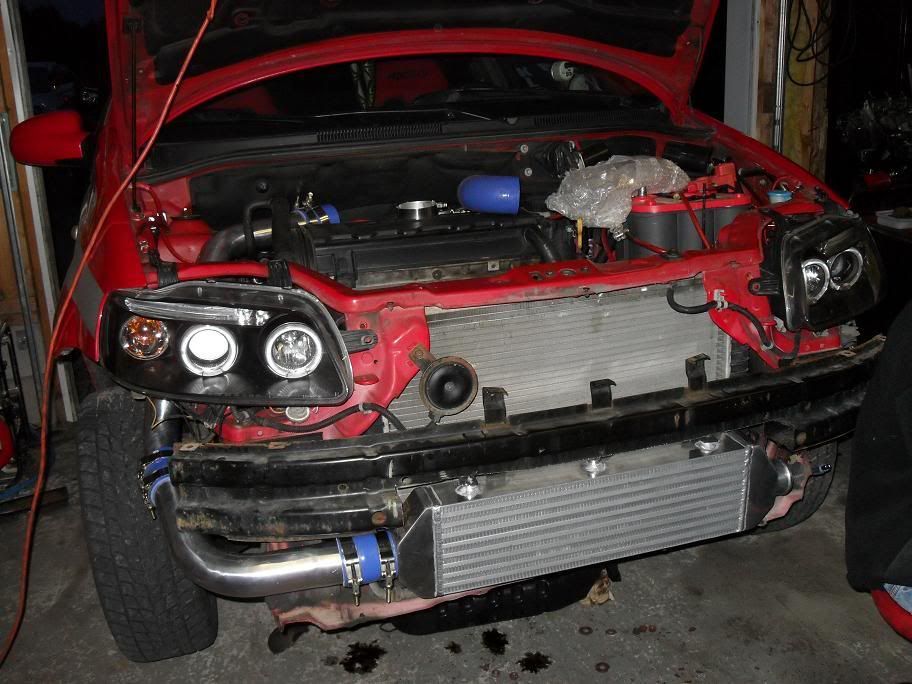
- Intercooler installed
- Charge piping from throttle body to intercooler installed
- Cat and downpipe removed, exhaust cut right behind flex pipe
- Oil pan removed, tapped for oil return and reinstalled
Little accident happened to me, while cutting up the front bumber, the grinder cutting disk snapped in 3, one piece hit my legs and I barely felt it, one other piece flew off somewhere and the 3rd piece hit my left forearm full force right behind the wrist! I gotta say thank god I was wearing my cotton vest, which has loose enough sleeves that it slowed the shrapnel down quite a bit but it still hurt me pretty bad, felt like my arm had been hit by a sledge hammer and broken in 2. Also punctured a small hole the size of a pencil lead in my arm, god knows how deep but holy crap that hurt! I got lucky.. No more grinders lol
On to pics now, enjoy!
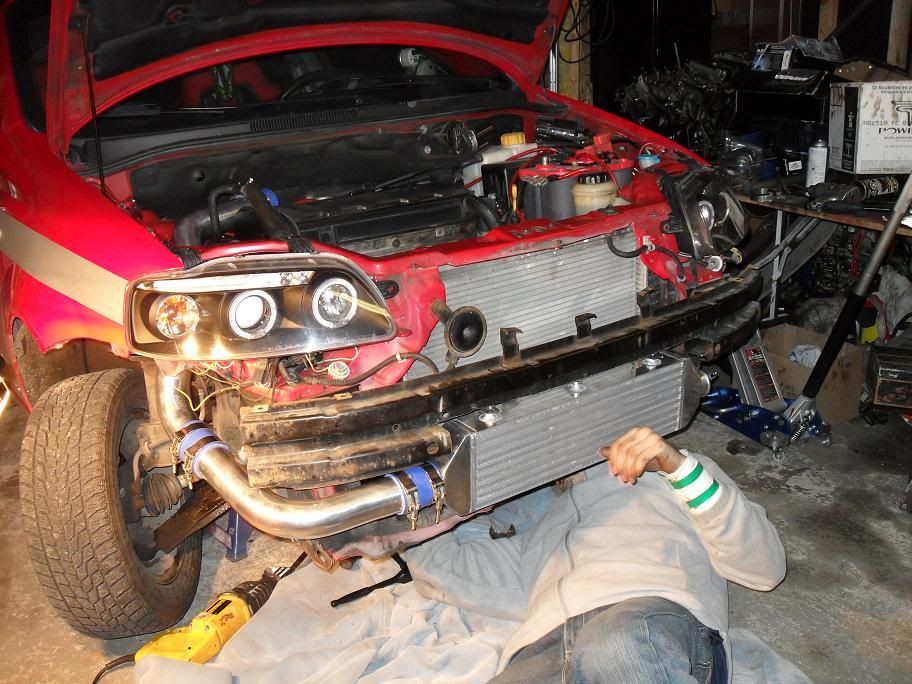
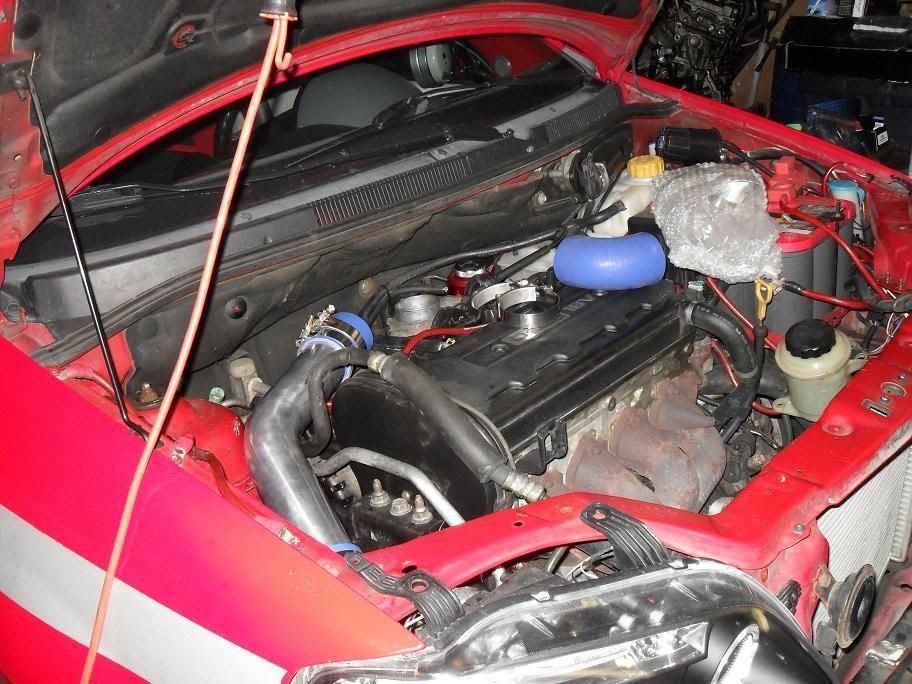
- Front bumber removed
- Air Conditionner radiator removed (Don't have A/C anymore)
- Intercooler installed
- Charge piping from throttle body to intercooler installed
- Cat and downpipe removed, exhaust cut right behind flex pipe
- Oil pan removed, tapped for oil return and reinstalled
Little accident happened to me, while cutting up the front bumber, the grinder cutting disk snapped in 3, one piece hit my legs and I barely felt it, one other piece flew off somewhere and the 3rd piece hit my left forearm full force right behind the wrist! I gotta say thank god I was wearing my cotton vest, which has loose enough sleeves that it slowed the shrapnel down quite a bit but it still hurt me pretty bad, felt like my arm had been hit by a sledge hammer and broken in 2. Also punctured a small hole the size of a pencil lead in my arm, god knows how deep but holy crap that hurt! I got lucky.. No more grinders lol
On to pics now, enjoy!
2004 Hatchback 2.0L Turbocharged
- T3/T4 T04E .60 A/R Compressor
- HKS SSQV, OBX Wastegate
- FMIC with 2.5" piping
- Tuned with Megasquirt II v3.57
- T3/T4 T04E .60 A/R Compressor
- HKS SSQV, OBX Wastegate
- FMIC with 2.5" piping
- Tuned with Megasquirt II v3.57
-
Reddemonx92
- Posts: 629
- Joined: Sun Sep 13, 2009 9:16 pm
- Location: Orlando, FL
Re: Aveo 2.0L Turbo [Day 1 install pics up!]
Wow you just started and its looking nice
-
Oscarthagrouch003
- Posts: 127
- Joined: Mon Jan 18, 2010 7:31 pm
- Location: Victoria Texas USA
Re: Aveo 2.0L Turbo [Day 1 install pics up!]
keep it up man. love that ur doing this~ 
Re: Aveo 2.0L Turbo [Day 1 install pics up!]
should keep the AC, i cant live with out mine
2004 Suzuki Swift+S (Adventure Vehicle/Winter Car)
2008 Mitsubishi Galant (Daily driver/Highway Boat)
2008 Mitsubishi Galant (Daily driver/Highway Boat)

Re: Aveo 2.0L Turbo [Day 1 install pics up!]
Looks good man, that intercooler looks nice and large now that its mounted! Will there be alot of cutting on the bumper required?
Re: Aveo 2.0L Turbo [Day 1 install pics up!]
Been busy like hell past few days.
The kit is done and installed but im looking for a new motor asap, the crank seal is really giving way and pissing oil like crazy and i blew the crappy stock headgasket last night lol
I should have a new motor at hand this weekend, going to install a stronger and thicker headgasket on it
Didnt have a chance to sort out the pics, so ill snap some good ones once im done putting the new engine in.
Ohh btw, 1st and 2nd gear.. absolutely no traction lol its amazing BOOST FOR THE WIN!!
2004 Hatchback 2.0L Turbocharged
- T3/T4 T04E .60 A/R Compressor
- HKS SSQV, OBX Wastegate
- FMIC with 2.5" piping
- Tuned with Megasquirt II v3.57
- T3/T4 T04E .60 A/R Compressor
- HKS SSQV, OBX Wastegate
- FMIC with 2.5" piping
- Tuned with Megasquirt II v3.57
Re: Aveo 2.0L Turbo [Day 1 install pics up!]
You can check out some headgaskets here : http://importperformanceparts.net/
Look under the Opel section 2.0 16v. Stock thickness is 0.051".
Cometic Part no is: C4216-051 (-051 is the thickness)
You can also try contacting Garrett from Daftart/Holland Sport Performance, he might have some left.
Theres also some other stores on the net selling them along with Ebay.
I can't believe it went already..... did you tune it, or just start ripping it right away? Is the MS wired in and running?
As for the crank seal.....you should make sure you're not boosting/pressurizing the crank case. The little PCV tube that goes from the TB to the valve cover needs to be blocked or have 1 way valve installed. The larger PCV hose should be routed to the inlet of the turbo.
Last edited by exist3nce on Wed May 12, 2010 9:20 am, edited 1 time in total.
2004 Optra/Forenza/Lacetti
F28 6spd gearbox / KW V3 Coilovers
Boosted and Daily driven since Dec. 2006
T04B V-Trim & E-Manage Blue
F28 6spd gearbox / KW V3 Coilovers
Boosted and Daily driven since Dec. 2006
T04B V-Trim & E-Manage Blue
Return to “Engine / Drivetrain”
Who is online
Users browsing this forum: No registered users and 14 guests