Headlight Painting aka "Joey Mod" w/Pics 56K Warning
Posted: Fri Oct 16, 2009 12:38 am
Ok, so I know there is already a topic like this that we put in the Exterior FAQ, but here's some pictures that walk you through it with a few pointers.
Remove the 3 bolts on each headlight and remove the housing. Take out your headlight bulb, the ruber gasket and all 3 rubber breather tubes on the housing.
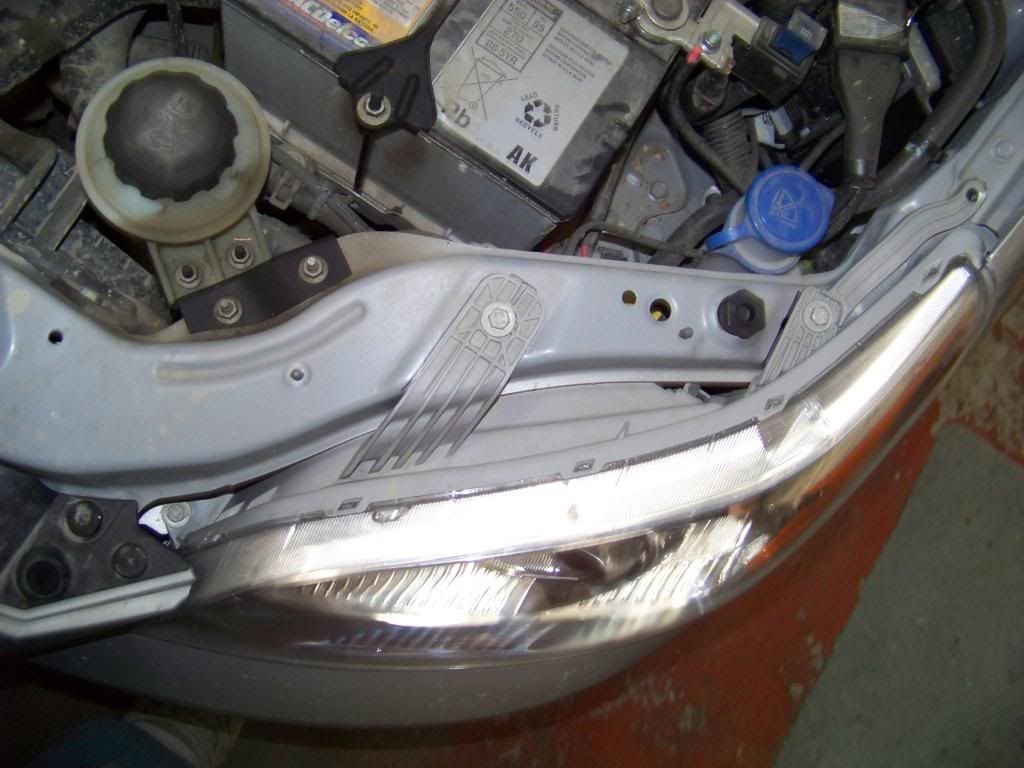
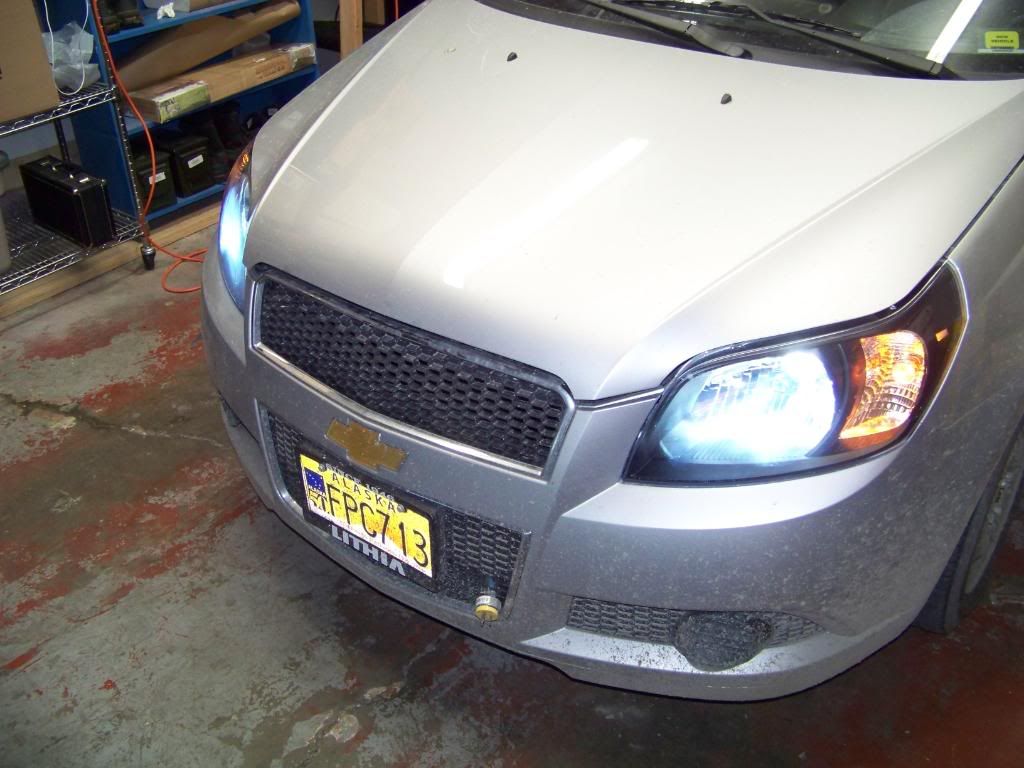
Your headlights are out.
Once your oven is pre-heated to 170*F on bake, put your headlight in for 10-12 minutes.
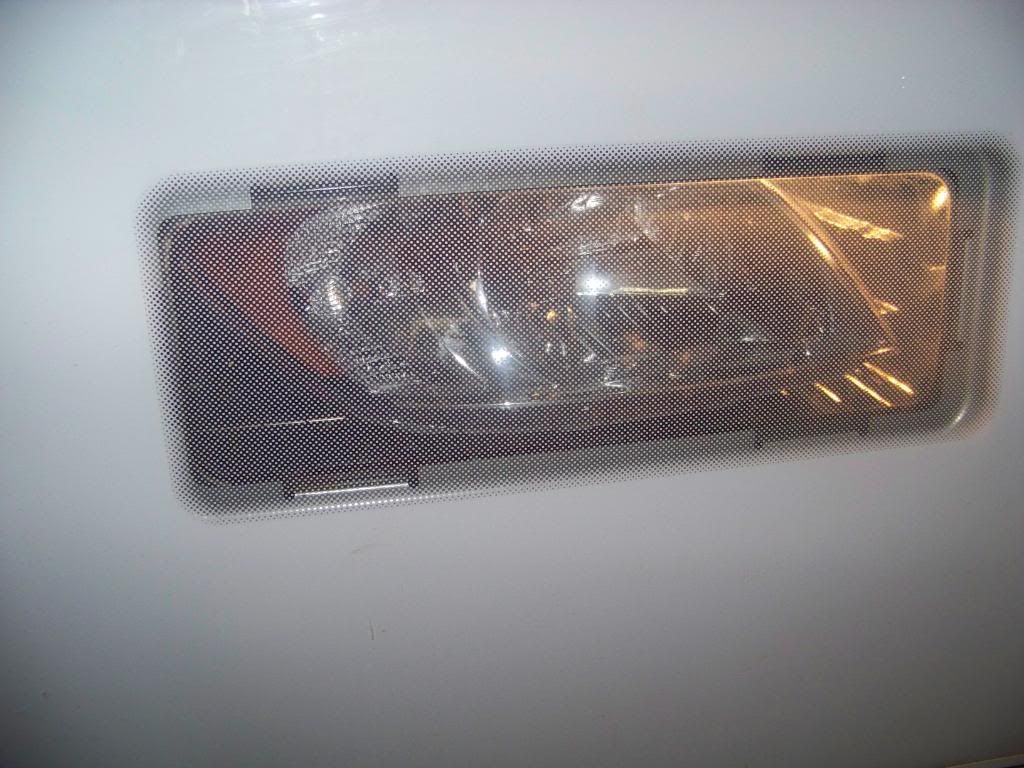
When you pull it out pry the little clips holding the lense to the housing with a small screwdriver and pry the housing from the lense with all your man power.
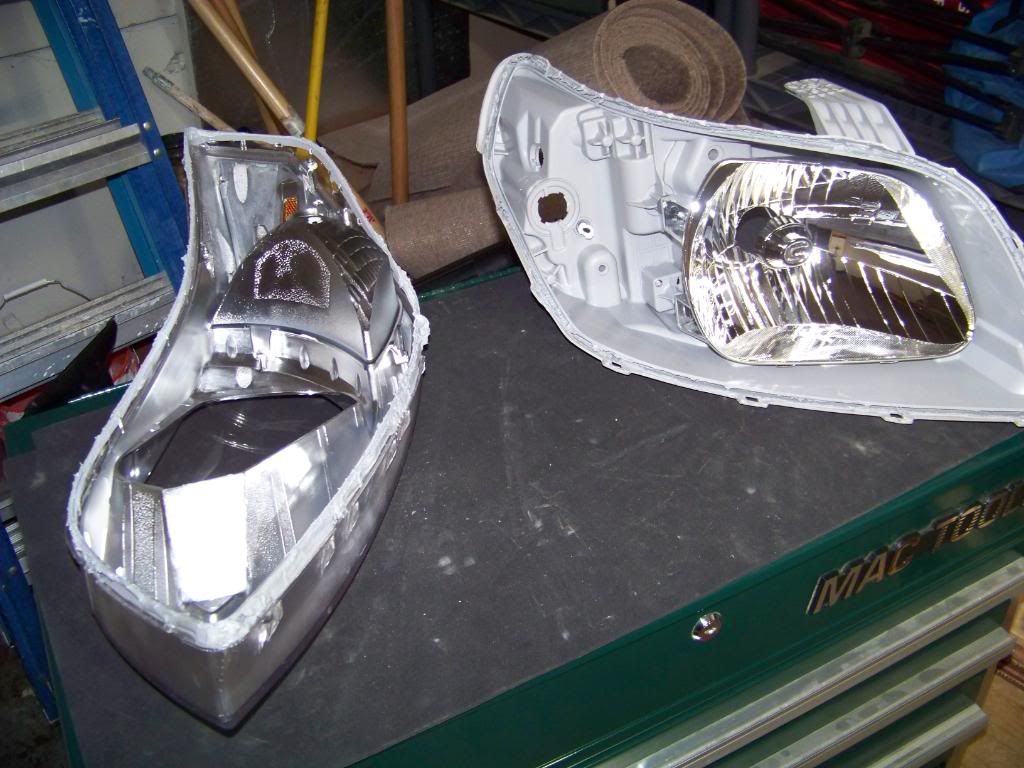

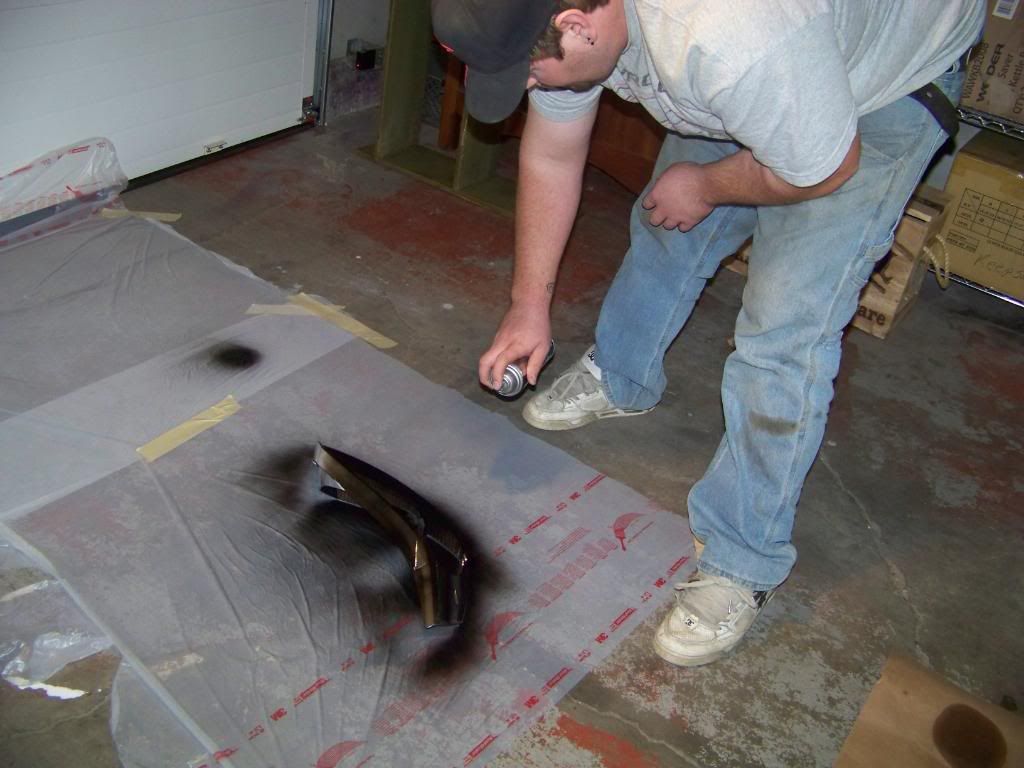
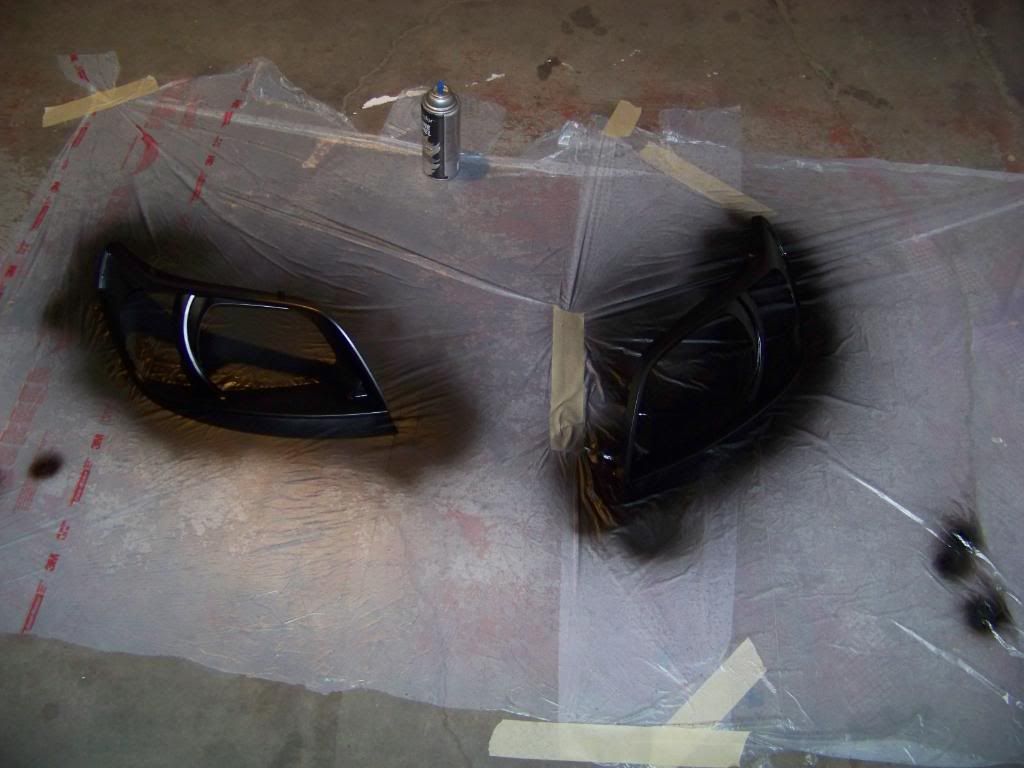
Where the chrome frame attaches to the clear lense there should be quite a few little silver screws holding them together, remove them all so you can take the turn-signal reflecter side out and you just have the frame you want to paint now. This is where you have to make a choice about what you're going to do with the reflector in you headlight housing. You can remove it like I did, tint it with some form of transllucent paint or you can remove it and replace it once you've painted your chrome black. I left mine out completely cuz' I hated them. Clean it with a wax, grease and oil remover and do not touch it with your fingers or your paint will bubble. For paint I used Dupli-Color Black Low-Gloss Engine Enamel. Start painting.

Nice even light coats.
Let it dry for a while, don't be in a rush even though it looks reall cool now.
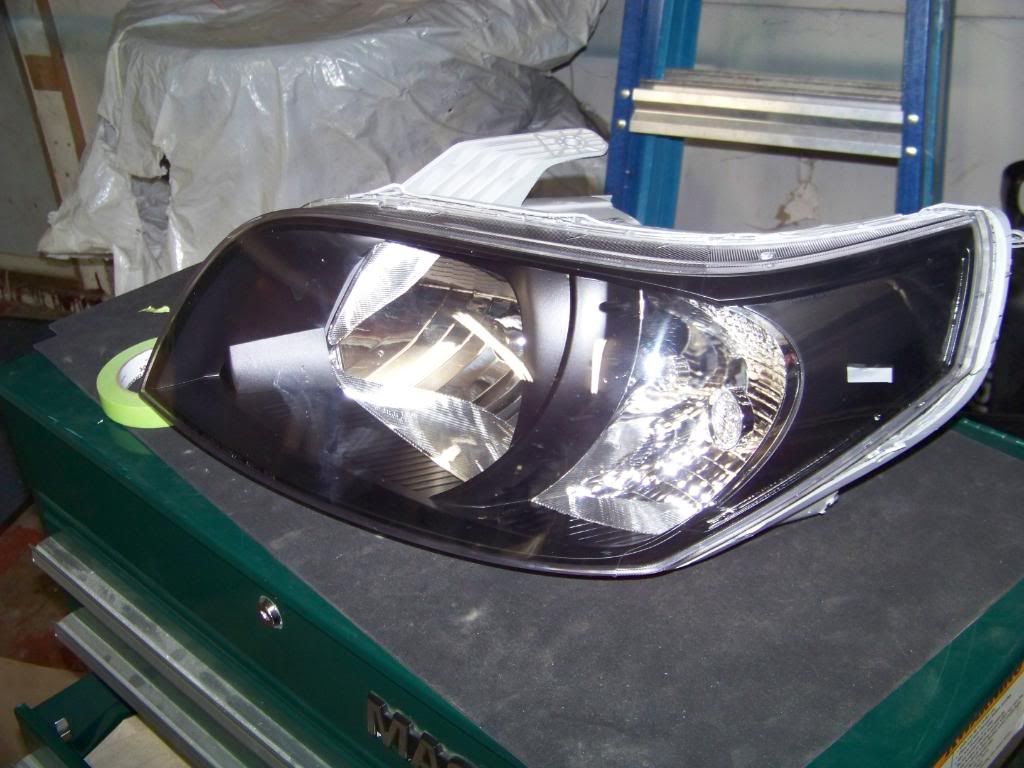
Once dry, put it all back together the way it was, but don't try to get a tight fit with the 2 pieces yet. Make sure before you put it all back together that the inside of your lense is clean, so you dont have fingerprints or smudges on the inside of your headlights. Put it back in the oven for 10-12 minutes, run a bead of clear RTV silicone around the whole thing and smash it back together until it clips in. Make sure you don't get any of your silicone on the lense cuz' it's a bitch to get off, if you do clean it immediately with windex and a paper towel while it's still wet.
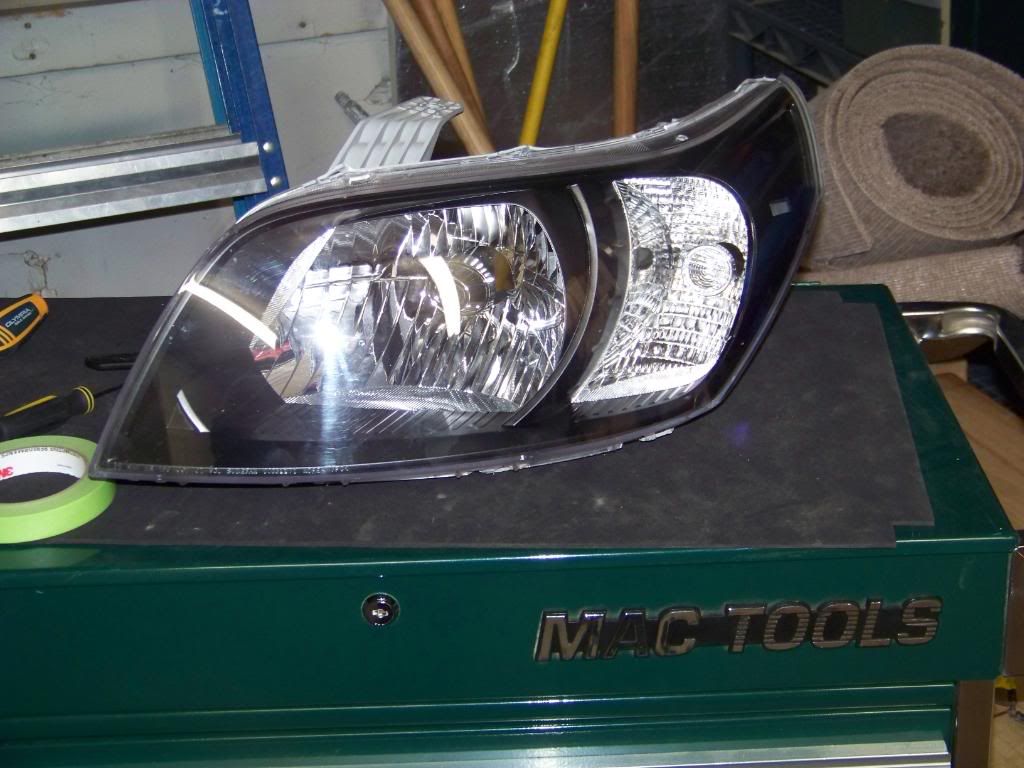
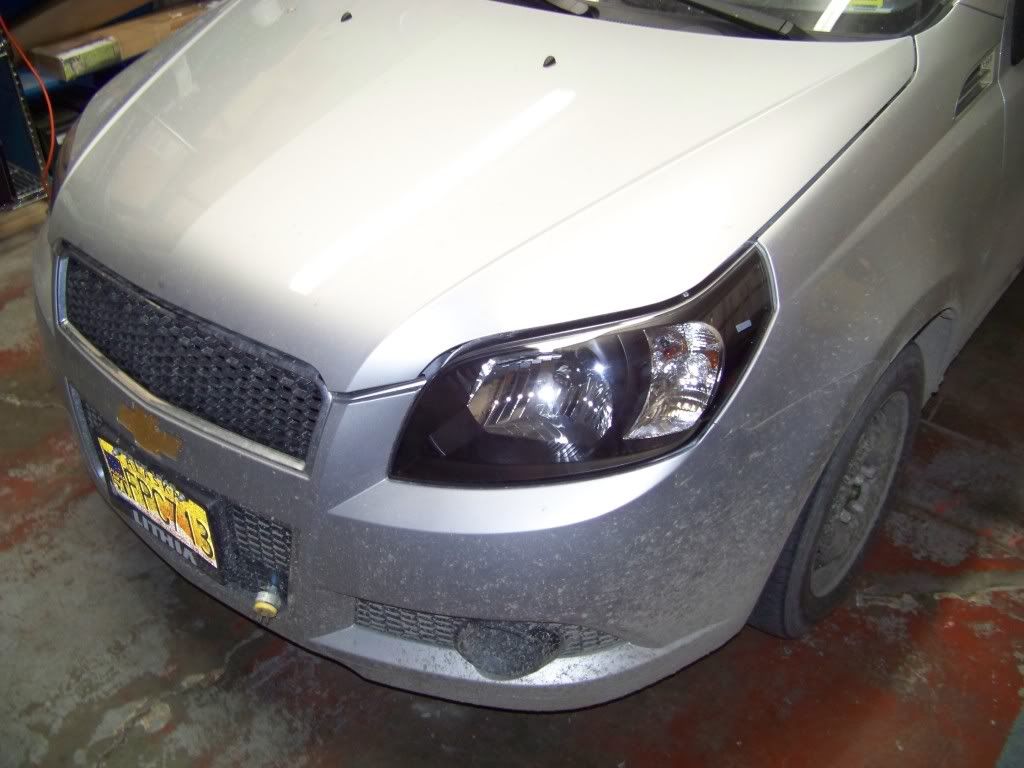
Finished product:
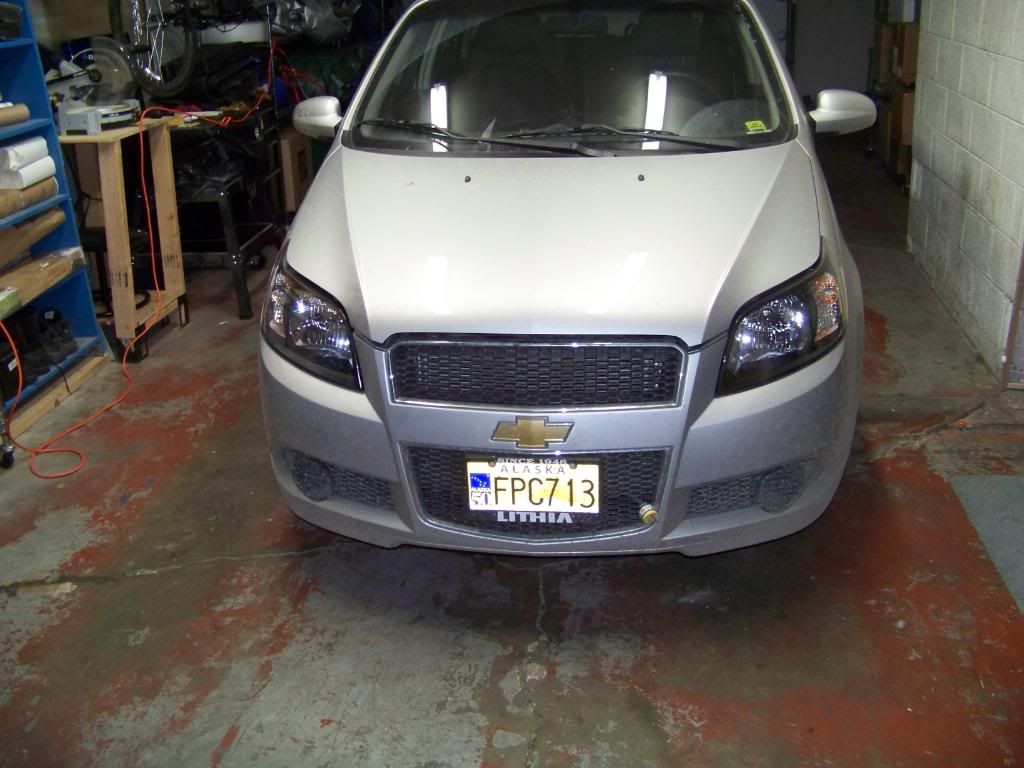
Put it all back on your car and bolt em' down. If you left the reflector removed you will need to get a pair of 194 amber bulbs for your sidemarkers.
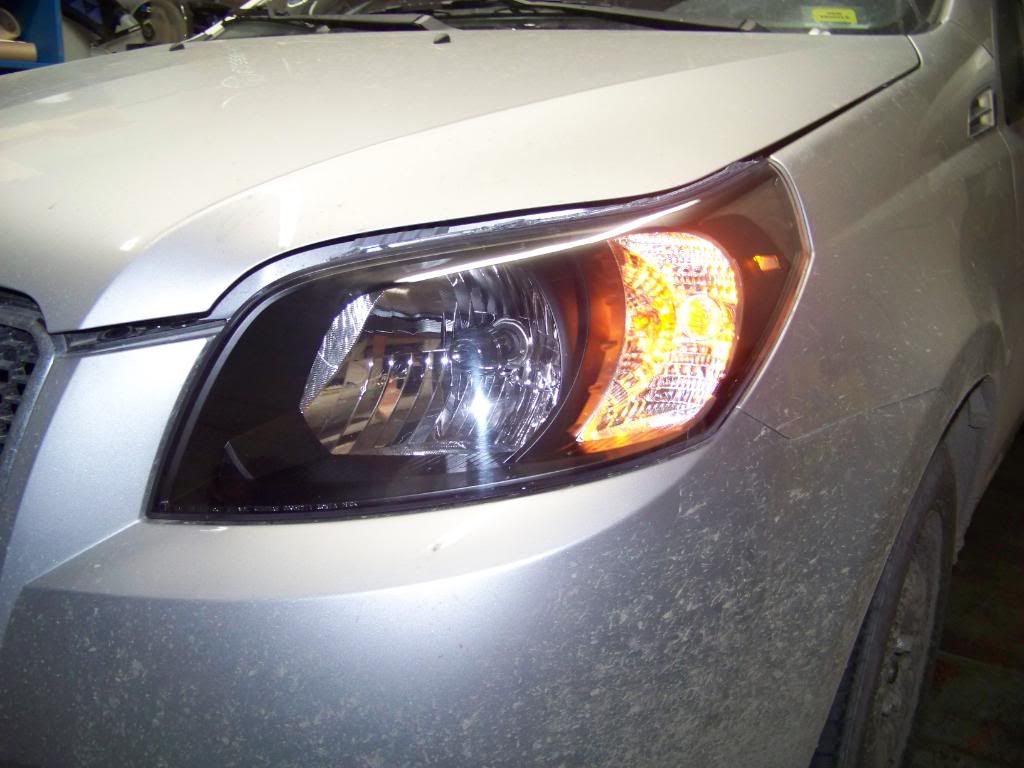
No light output lost.

Have fun and enjoy your new custom $10 headlights.
Remove the 3 bolts on each headlight and remove the housing. Take out your headlight bulb, the ruber gasket and all 3 rubber breather tubes on the housing.
Your headlights are out.
Once your oven is pre-heated to 170*F on bake, put your headlight in for 10-12 minutes.
When you pull it out pry the little clips holding the lense to the housing with a small screwdriver and pry the housing from the lense with all your man power.
Where the chrome frame attaches to the clear lense there should be quite a few little silver screws holding them together, remove them all so you can take the turn-signal reflecter side out and you just have the frame you want to paint now. This is where you have to make a choice about what you're going to do with the reflector in you headlight housing. You can remove it like I did, tint it with some form of transllucent paint or you can remove it and replace it once you've painted your chrome black. I left mine out completely cuz' I hated them. Clean it with a wax, grease and oil remover and do not touch it with your fingers or your paint will bubble. For paint I used Dupli-Color Black Low-Gloss Engine Enamel. Start painting.
Nice even light coats.
Let it dry for a while, don't be in a rush even though it looks reall cool now.
Once dry, put it all back together the way it was, but don't try to get a tight fit with the 2 pieces yet. Make sure before you put it all back together that the inside of your lense is clean, so you dont have fingerprints or smudges on the inside of your headlights. Put it back in the oven for 10-12 minutes, run a bead of clear RTV silicone around the whole thing and smash it back together until it clips in. Make sure you don't get any of your silicone on the lense cuz' it's a bitch to get off, if you do clean it immediately with windex and a paper towel while it's still wet.
Finished product:
Put it all back on your car and bolt em' down. If you left the reflector removed you will need to get a pair of 194 amber bulbs for your sidemarkers.
No light output lost.
Have fun and enjoy your new custom $10 headlights.