FAQ

User avatar
Petrified.Rabbit
Posts: 1254
Joined: Sat Sep 12, 2009 12:08 am
Location: Pittsburgh

FAQ

Postby Petrified.Rabbit » Sun Sep 13, 2009 10:26 pm

Installing a spoiler: viewtopic.php?f=7&t=24&p=81#p81

Removal and tinting of first generation front turns: viewtopic.php?f=7&p=82#p82

Home depot front lip: viewtopic.php?f=7&t=24&p=83#p83

Emblem removal or De-Badging: http://www.aveonetwork.com/viewtopic.ph ... 4&p=93#p93

Headlight mods:
1. (in russian) with lots of pictures: viewtopic.php?f=7&t=24&p=84#p84
2. HID projector retrofit: viewtopic.php?f=7&t=24&p=89#p89
3.Disabling DRL: http://www.aveonetwork.com/viewtopic.ph ... 4&p=91#p91
4.City lights: http://www.aveonetwork.com/viewtopic.ph ... 4&p=92#p92

Side signal removal/installation: http://www.aveonetwork.com/viewtopic.ph ... 4&p=94#p94

Grill mod for 1st Gen. Aveo: viewtopic.php?f=7&t=24&p=181#p181

Black Headlight Mod/Headlight Painting: viewtopic.php?f=7&t=24&p=193#p193


User avatar
Petrified.Rabbit
Posts: 1254
Joined: Sat Sep 12, 2009 12:08 am
Location: Pittsburgh

Re: FAQ

Postby Petrified.Rabbit » Sun Sep 13, 2009 10:27 pm

gsills wrote:Its pretty simple...

if you have a hatch back there is all ready spots for you to drill.

you have to measure the centre spot as they did not mark that.

The pictures say it all
Image
Image
measure once cut twice....

i did not drill the centre hole right the first time but thats what silicone is good for!
Image
Image
some double sided 3m tape

Image

pump those holes with some silicone
Image

end product
Image
Image

User avatar
Petrified.Rabbit
Posts: 1254
Joined: Sat Sep 12, 2009 12:08 am
Location: Pittsburgh

Re: FAQ

Postby Petrified.Rabbit » Sun Sep 13, 2009 10:29 pm

ChevroletRyan wrote:Originally posted by aveoike

I used regular 20% window tint. Took me 1 to 1.5 hours to do. (had trouble with the tint on the first light) This cost me $10 + time. To pay someone to paint it, the right way would run you about $100 for tails and another $40 for front TS in my area.

Sorry for the large pictures. I dont know how to resize them, once downloaded.

1. Remove your grill, 5 screws-philips head

2. Remove the head lamp which is held in with 3 10mm bolts. then unplug the harness.
Image


3. Remove the 3 bulbs from the turnsignal and 2 9/32 bolts
Image

4. Push inward on the lamp with medium strength is tough to pull out.
Image
Image
5. Apply your tint to the light, work out your bubbles and trim.

6. Reverse the process to put back in. Careful not to scratch it.
Finished...
Image

User avatar
Petrified.Rabbit
Posts: 1254
Joined: Sat Sep 12, 2009 12:08 am
Location: Pittsburgh

Re: FAQ

Postby Petrified.Rabbit » Sun Sep 13, 2009 10:31 pm

mikedudley17 wrote:http://www.cobaltss.net/forums/showthread.php?p=2527748&posted=1#post2527748


[QUOTE=Eric304;1770964]Well, It's the Home Depot $10 dollar lip. I think it looks decent for the cost, plus you don't have to worry about cracking/scratching it. Everyone who see's my car loves it.

If you guys wanna try it out and see how you like it, then here's the instructions on how to put it on. Only thing is, in the directions, they say to nail or screw it in, and I didn't do that cause the 3M Heavy Duty Double Side Stick tape works well.


Here is the How To

Step 1:
Go to Home Depot!
Image

Step 2: Get Garage Door Bottom Seal, i think they come in 9 ft packs, one will be enough, 2 if u think u will mess up (part #03749)(also notice that there is a foam type and a hard rubber type, i prefer the foam) and a two sided double stick tape that is preferably black, lots of tape, lol (less is seen when black)
Image
Image

Step 3: Place Double stick tape On smaller edge of weather striping.
Image

Step 4: Clean bottom surface of bumper to apply lip. The take off top cover on tape to prepare it to stick on bumper. When putting the lip around the bumper, make sure it sits flush, some like it back more, but i like it flush. Go slow and make sure to get the tape to stick evenly, any extra weather stripping, just cut off flush at the end of the bumper:
Image
Image
Image

Step 5 (optional): I put screws in mine just for saftey, but its not needed, but i suggest it. Put a small screw vary on size depending on person along bottom edge on lip into bumper. I used some washers so it had more area on the lip. Make sure to put the screws back far enough that you wont put a screw out the front of the bumper. I put one about every 4-5 inches.
Image
Image
Image

And Here is the Finished Product of the GDBS LIP (Garage Door Bottom Seal LIP) LOL

Image

Image

Image

Image

Close-Ups

Image

Image

ENJOY!

[COLOR="Red"]Will Update This Thread With More Pics if Requested[/COLOR]


im considering doing it until i get my FG one made.[/quote]

User avatar
Petrified.Rabbit
Posts: 1254
Joined: Sat Sep 12, 2009 12:08 am
Location: Pittsburgh

Re: FAQ

Postby Petrified.Rabbit » Sun Sep 13, 2009 10:38 pm

topacho wrote:Articulo publicado en
http://topacho.wordpress.com

http://topacho.wordpress.com/2007/11/26 ... -de-cruce/

Punta Arenas, CHILE, Noviembre 2007.

Esta guía Es aplicable para Chevrolet Aveo 2006, 2007 y 2008, modelos anteriores el faro es distinto al descrito acá.
Bueno experimentando aca les traigo como modificar el faro delantero. desmontarlo del chassis y como desamblarlo.
Los Pasos a seguir serían los siguientes:

* bueno primero que todo.. APAGAMOS EL VEHÍCULO .. obvio.. pero no esta demás Cool

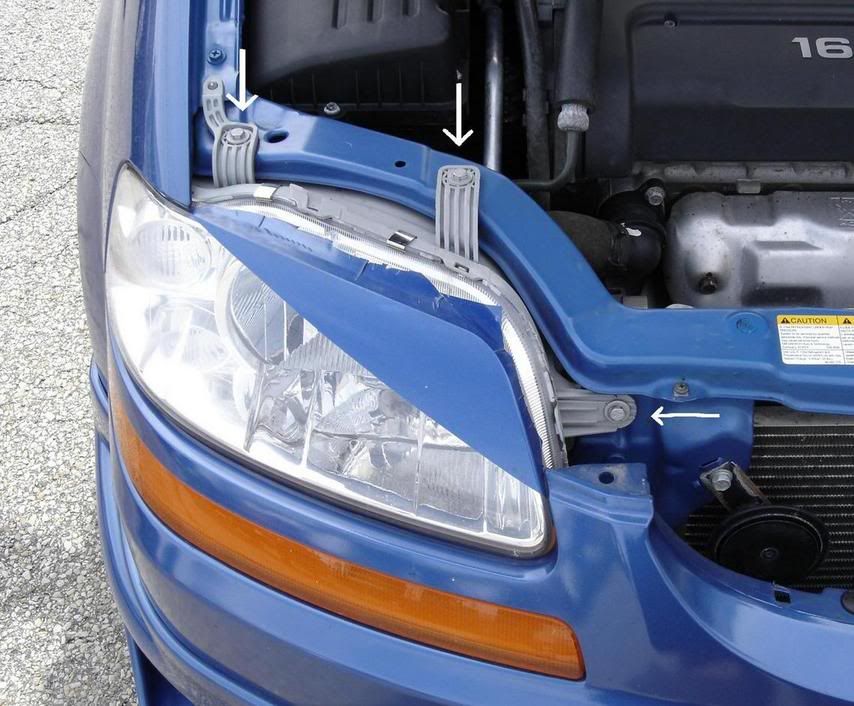
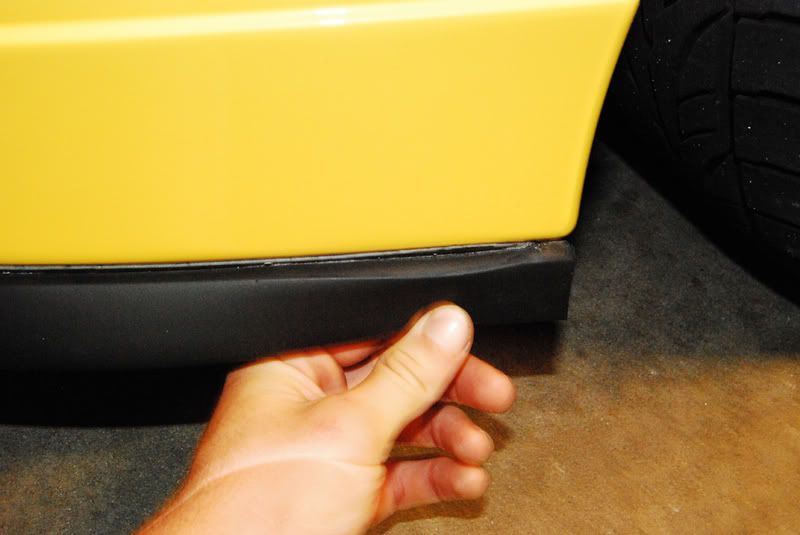
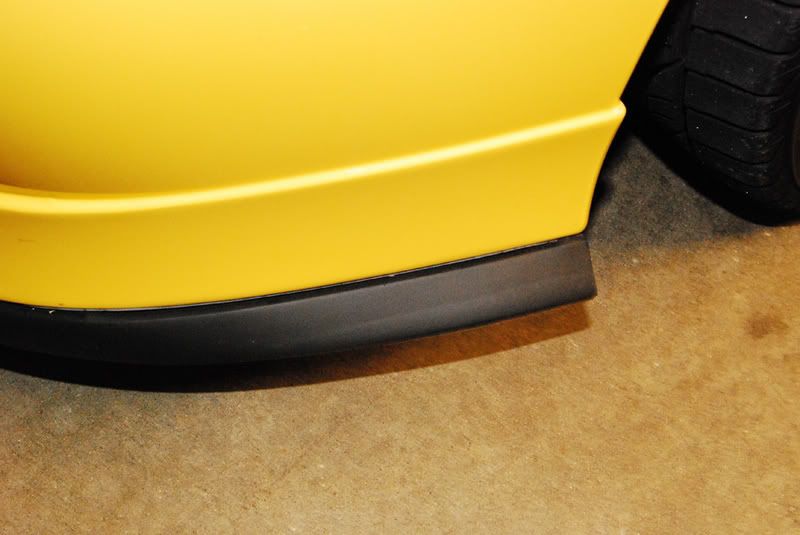
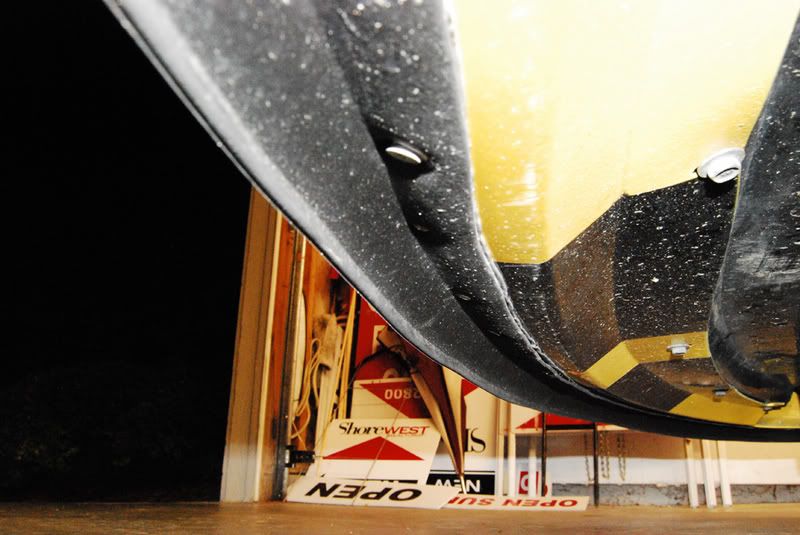
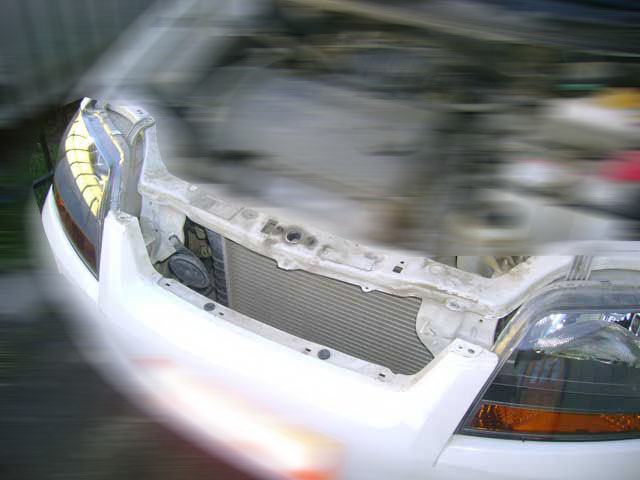
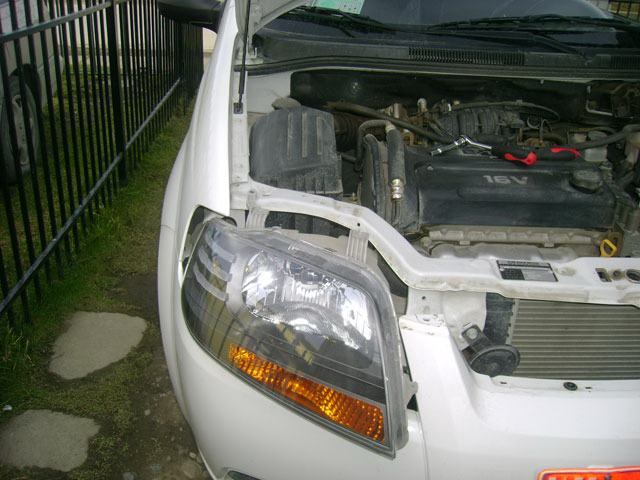
* seguido a esto abrimos el capo ( no se como se dice internacionalmente..) y procedemos a retirar la parrilla delantera.. quitando los tornillos que sujetan de ella al chassis, estos tornillos se encuentran en la parte de arriba de la parrilla, cuando saken la parrilla deberia verse algo asi:

Image

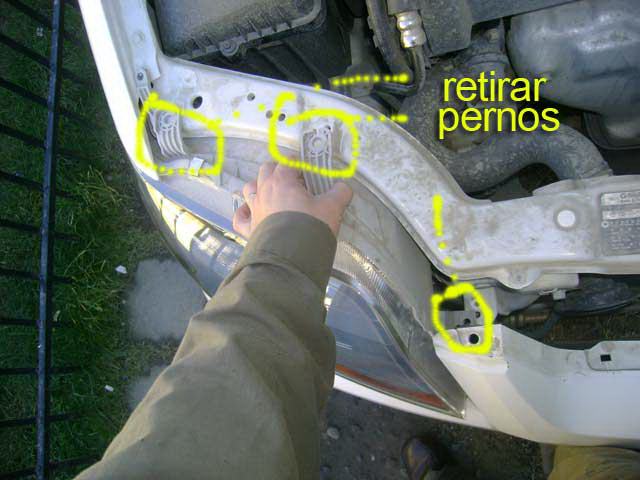
Seguido de esto retirar los 3 pernos que sujetan el faro del vehículo…

Image

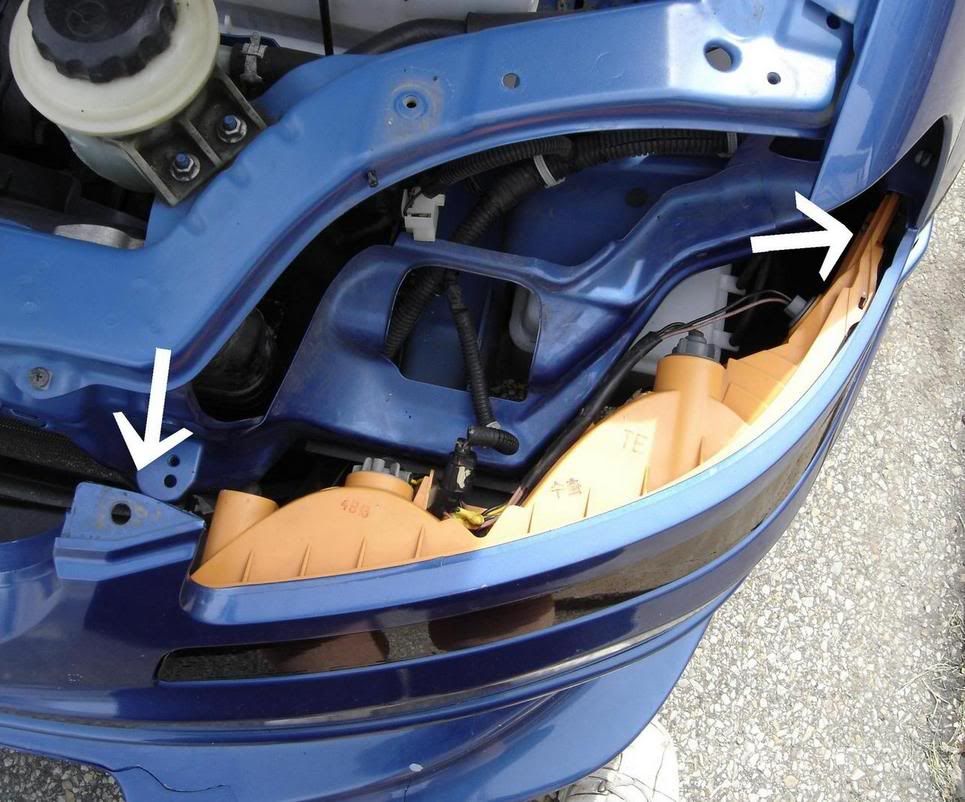
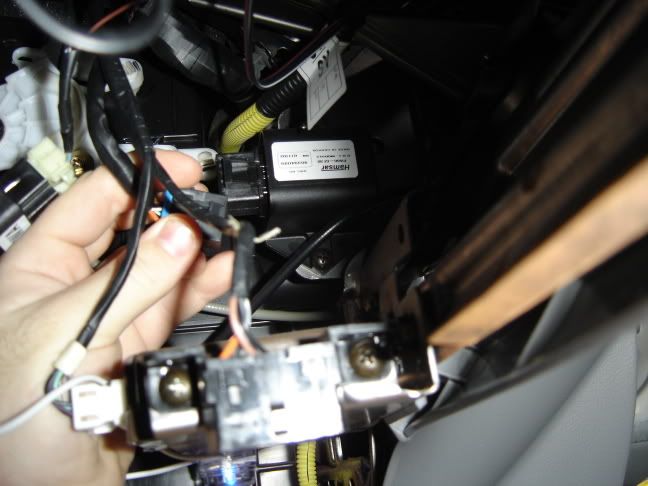
Una vez retirado los pernos.. desconectamos la alimentación de los bombillos o bulbos del faro para eso con mucho cuidado desconectamos el bombillo principal. luego el bombillo de señal de cruce y también el de estacionamiento.

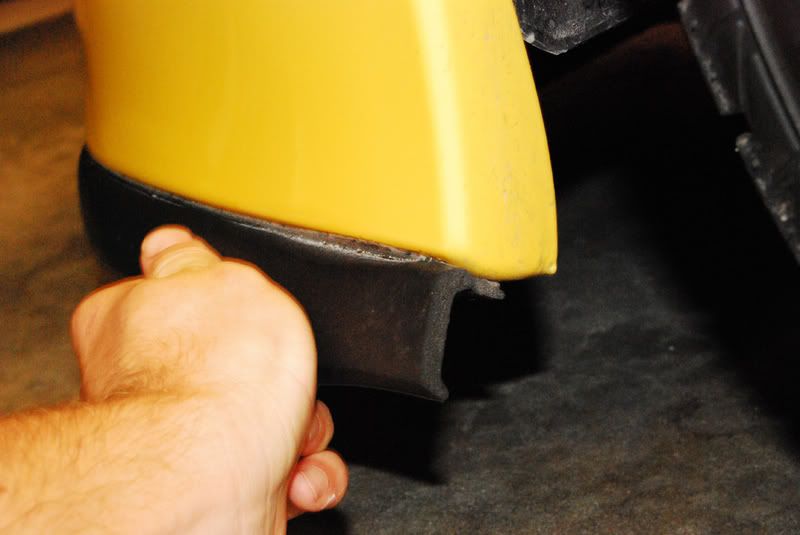
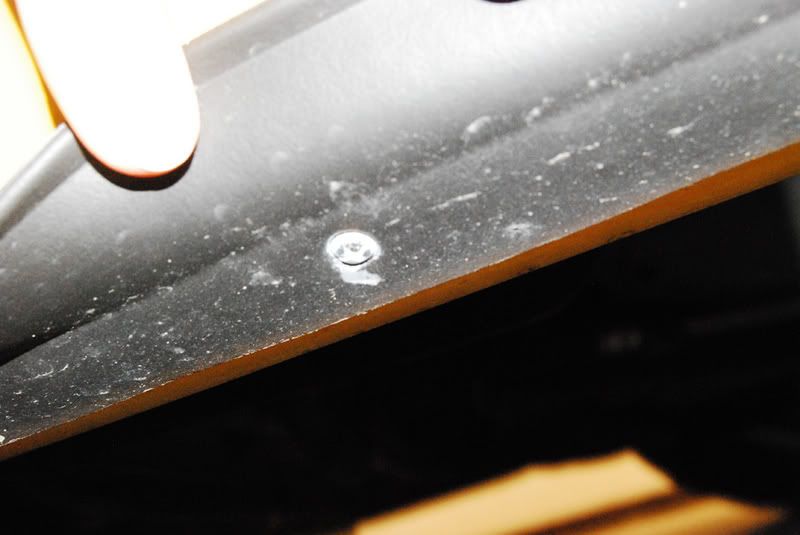
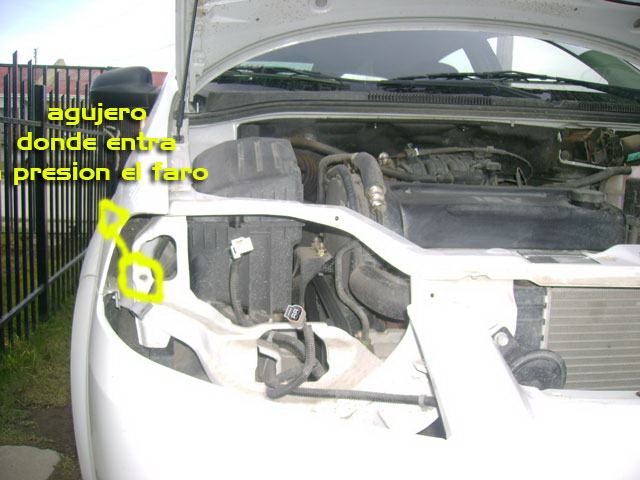
seguido de esto forzamos hacia afuera el faro teniendo en consideración que éste se encuentra sujeto al chasis con un tornillo que entra a presión. con mucho cuidado intentamos quitar el faro.. en detalle la parte que esta sujeta:
Image

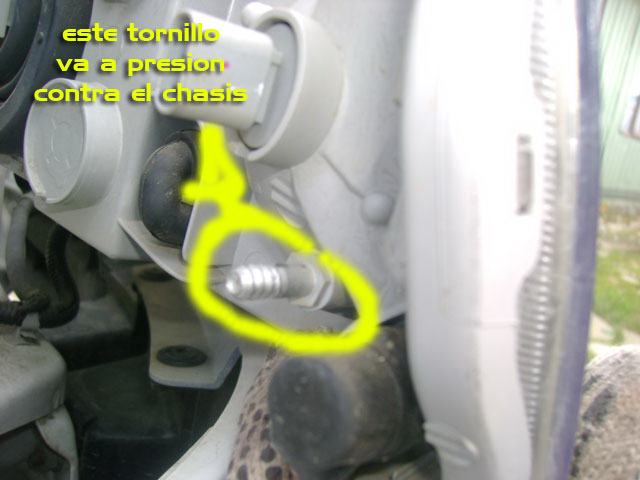
Detalle de tornillo que entra a presión al chasis:
Image
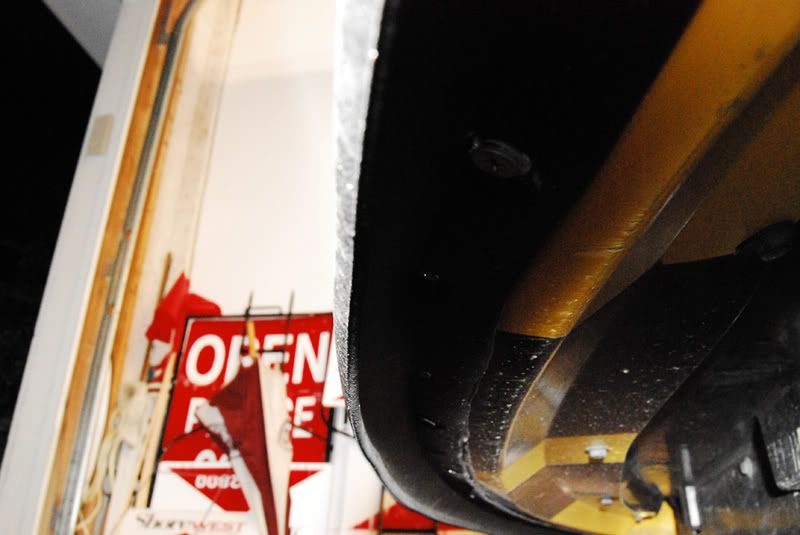
Detalle del agujero en el chasis donde entra a presión dicho tornillo que esta en la parte posterior del faro:
Image
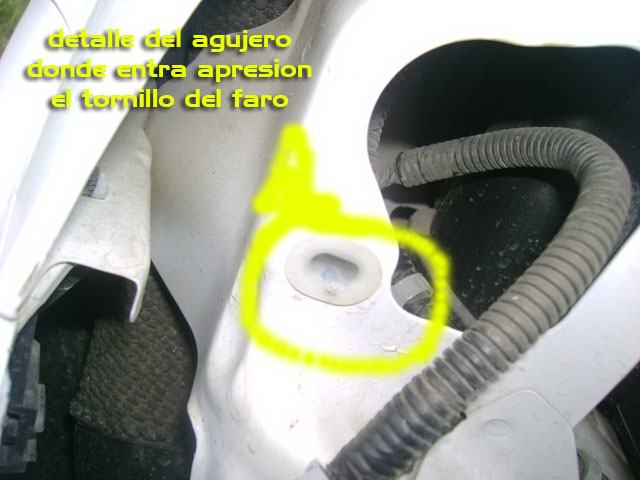
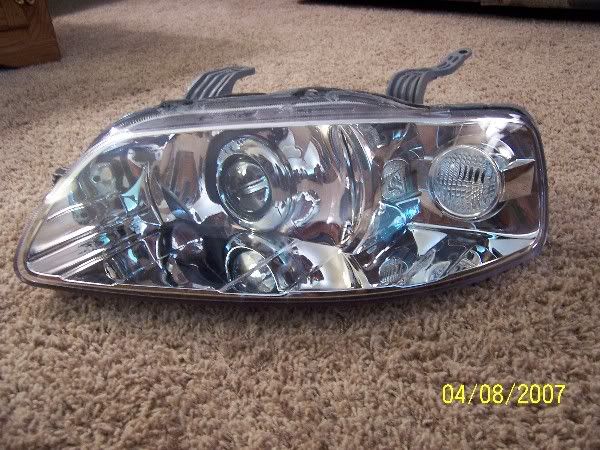
Foto del faro desenganchado del chasis :
Image
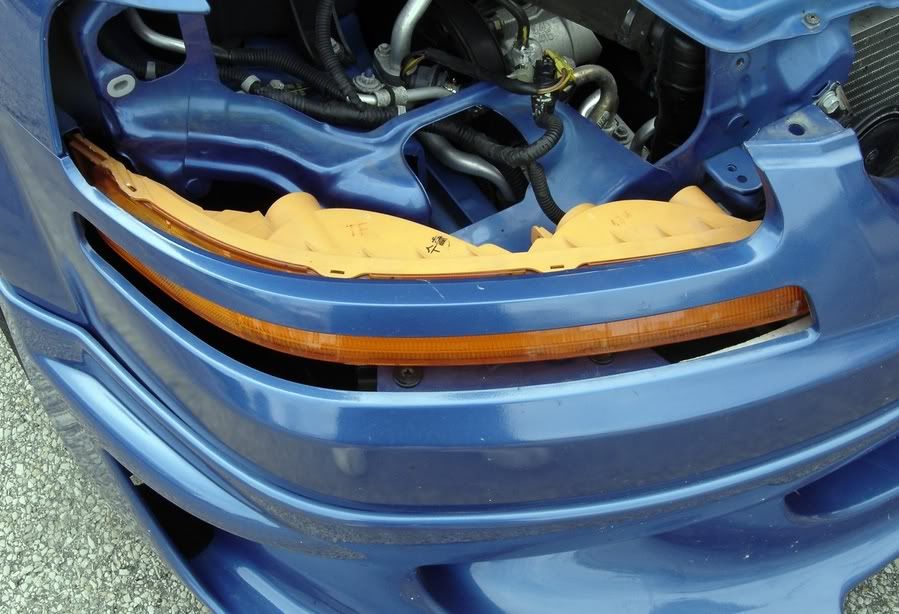
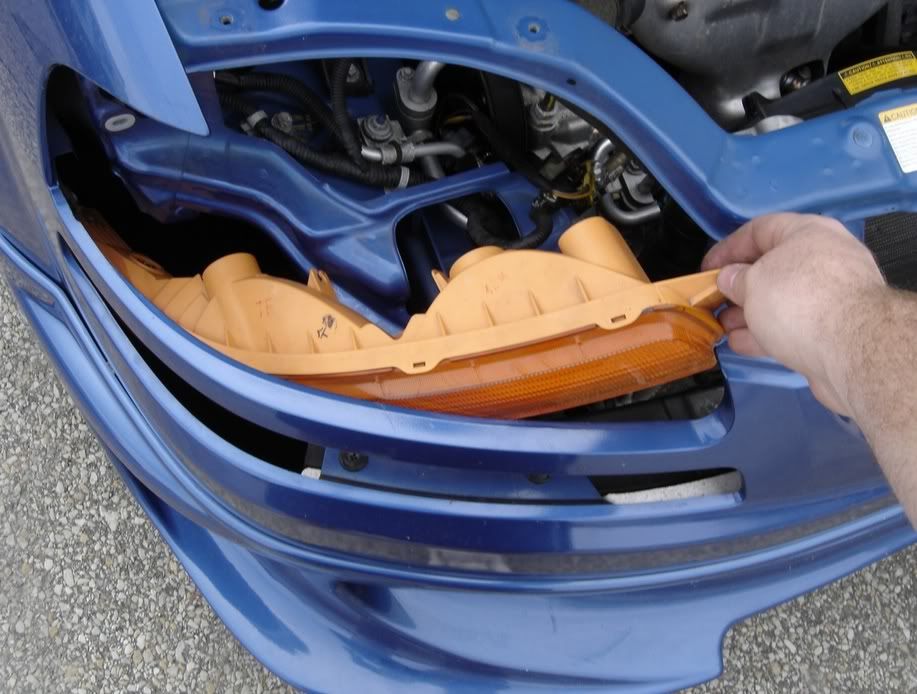
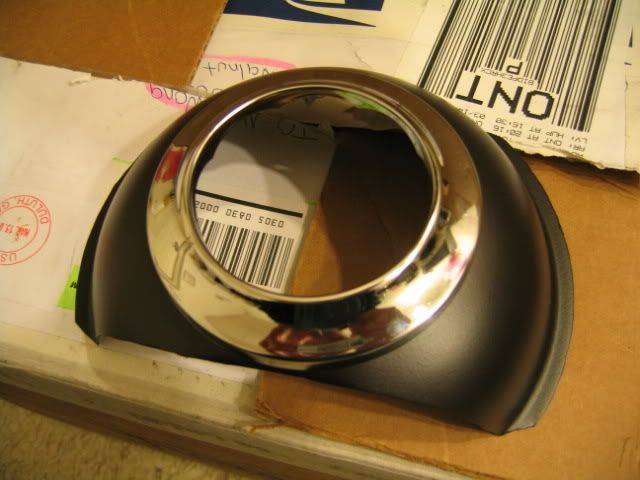
Pues ahora que tenemos sacado el faro del vehículo procedemos a despegar los ganchillos que unen la base del faro con la mica frontal-transparente del faro.
Image

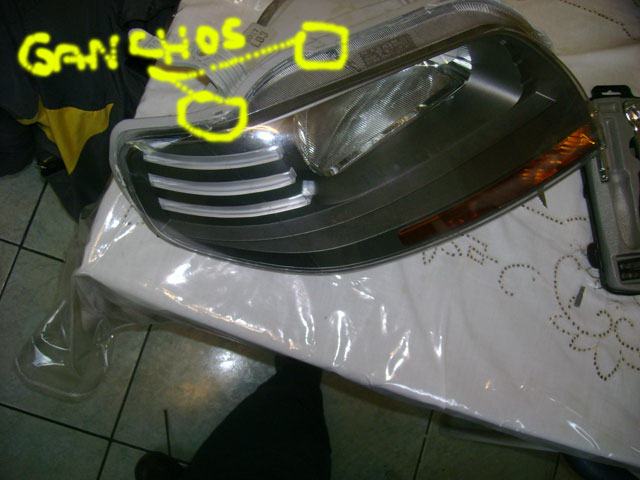
seguido de esto hay que calentar el pegamento de fabrica una especie de sellado de silicona, este se calienta con secador de pelo, pero lo mejor es una pistola de calor profesional para despegar mas fácil esta unión.
Image
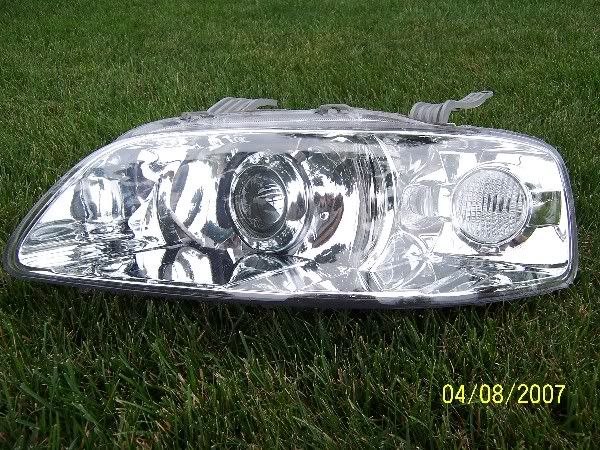
Bueno en el foro de aveo de venezuela hay muchos vehiculos que le quitan la mica inferior donde esta la señaletica naranja y quedaria algo asi:
Image
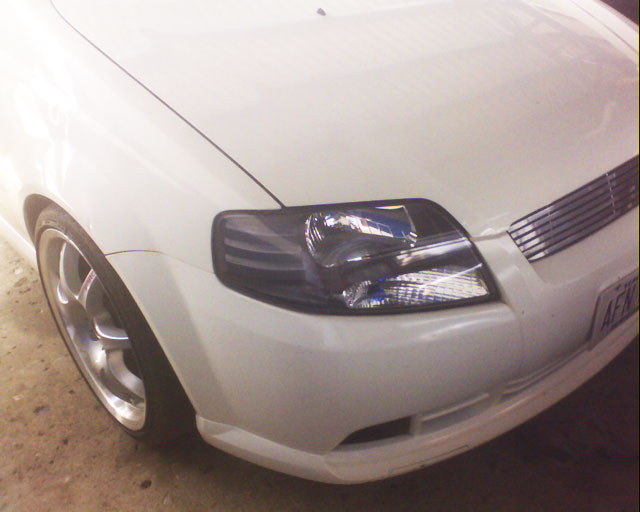
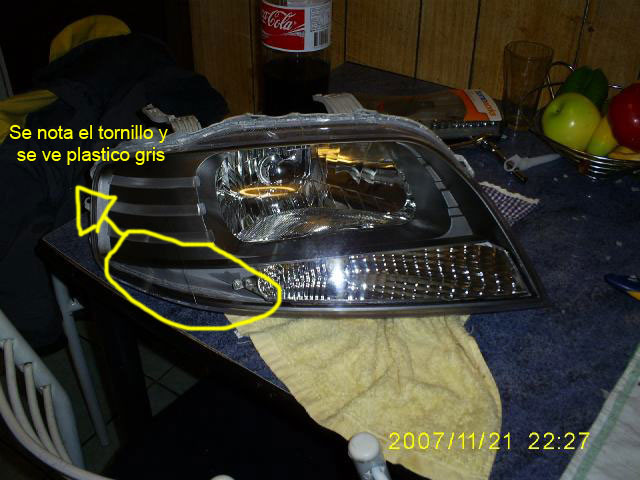
igual se ve muy deportivo , pero hay un detalle se nota el tornillo y se ve algo gris atras.. aqui monto mi faro como quedaria de esta manera:
Image
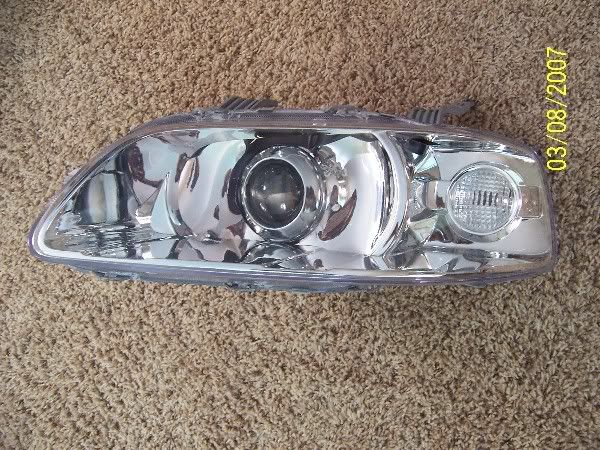
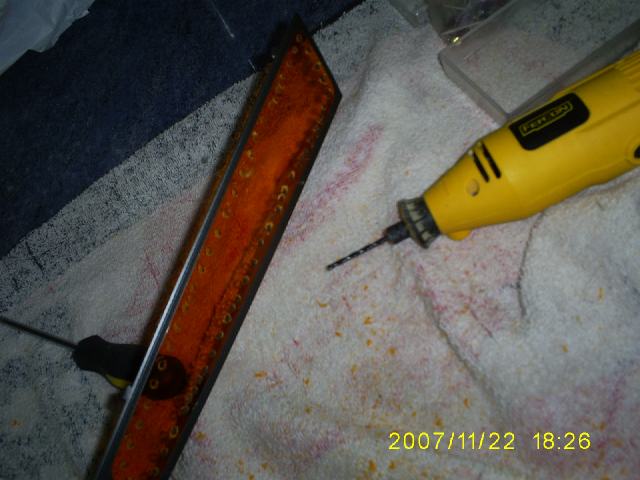
Entonces decidí hacer un poco mas de trabajo,y opte por quitar solo la parte naranja de la mica inferior de foco, para ello lo primero que hice con un dremel y una broca/mecha pequeña hice agujeros en toda la parte que quiero hacer el corte:
Image
Detalle de los cortes:
Image
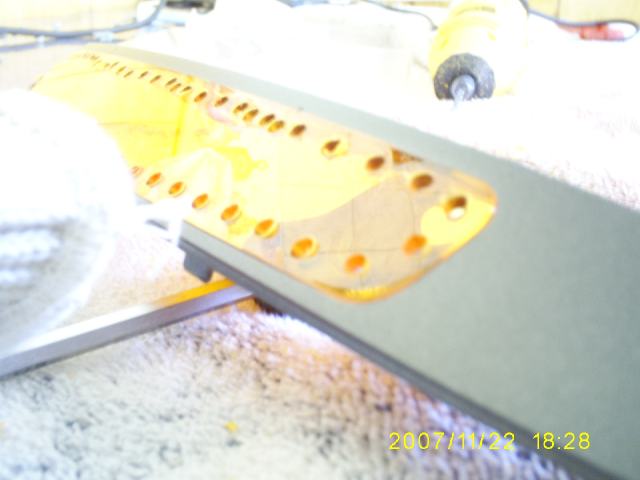
una vez realizado todos los agujeros, con un cuchillo caliente empeze a deretir/cortar entre agujero y agujero:
Image
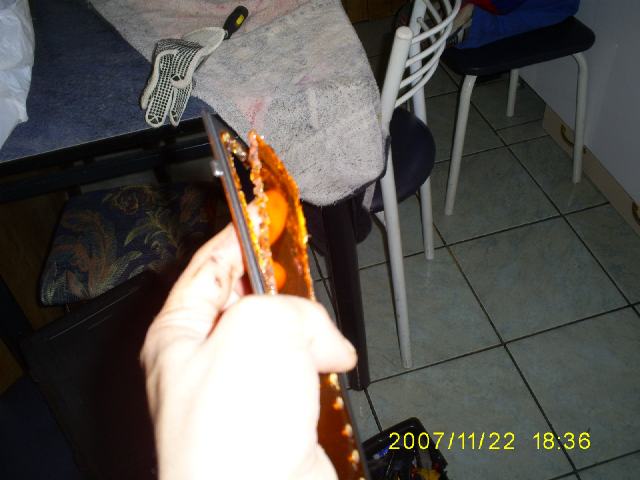
una ves cortado todo tenemos el resultado:
Image
Despues con el dremel y con una punta de liga rebaje mas el resto de mica naranja que quedo, afine con lima y con liga para que quitemos todo el plastico naranjo restante.. una vez finalizado queda asi:
Image
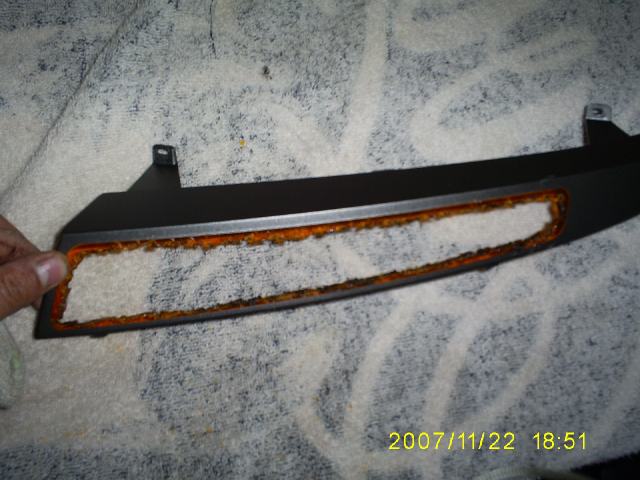
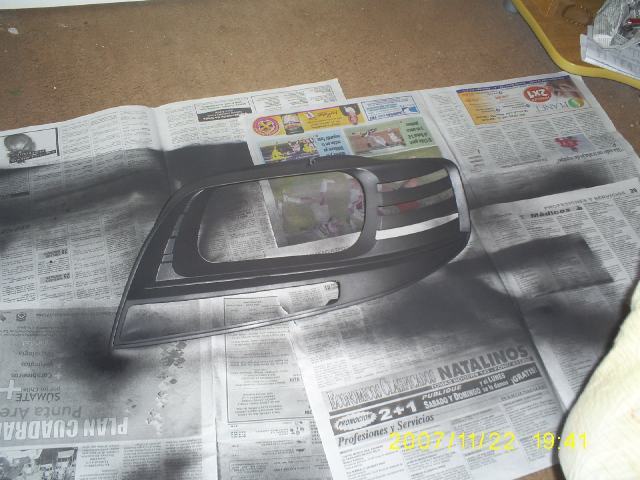
despues para resaltar mas el color de nuestra mica, pinte toda la mica interior de color negro mate, ya que el que trae de fabrica es un gris oscuro medianamente brillante, y con terminado negro opaco quedara de lujo, aqui la foto pintando el interior:
Image
Luego esperamos que seque un poco, yo utilize pintura de secado rapido, y bueno armamos el faro y estamos listo,

tambien hay que destacar que hay que cambiar la ampolleta/bombillo por una de color naranja.

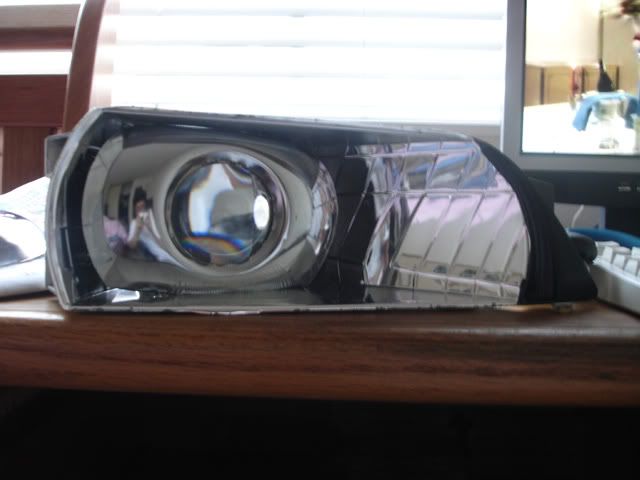
aqui una foto de los 2 faros, uno modificado y el otro original:
Image
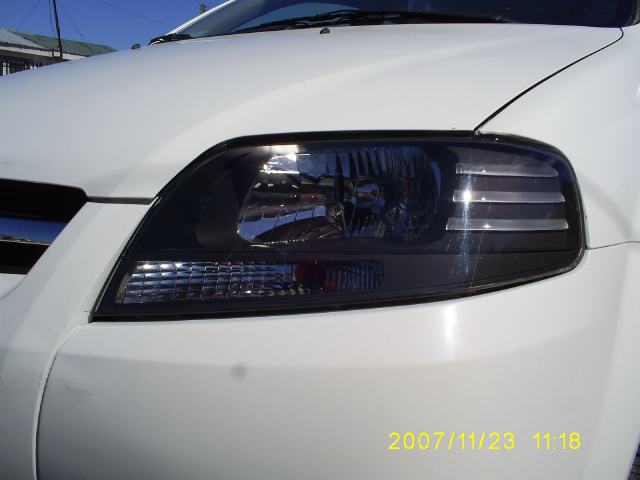
Detalle del faro terminado:
Image
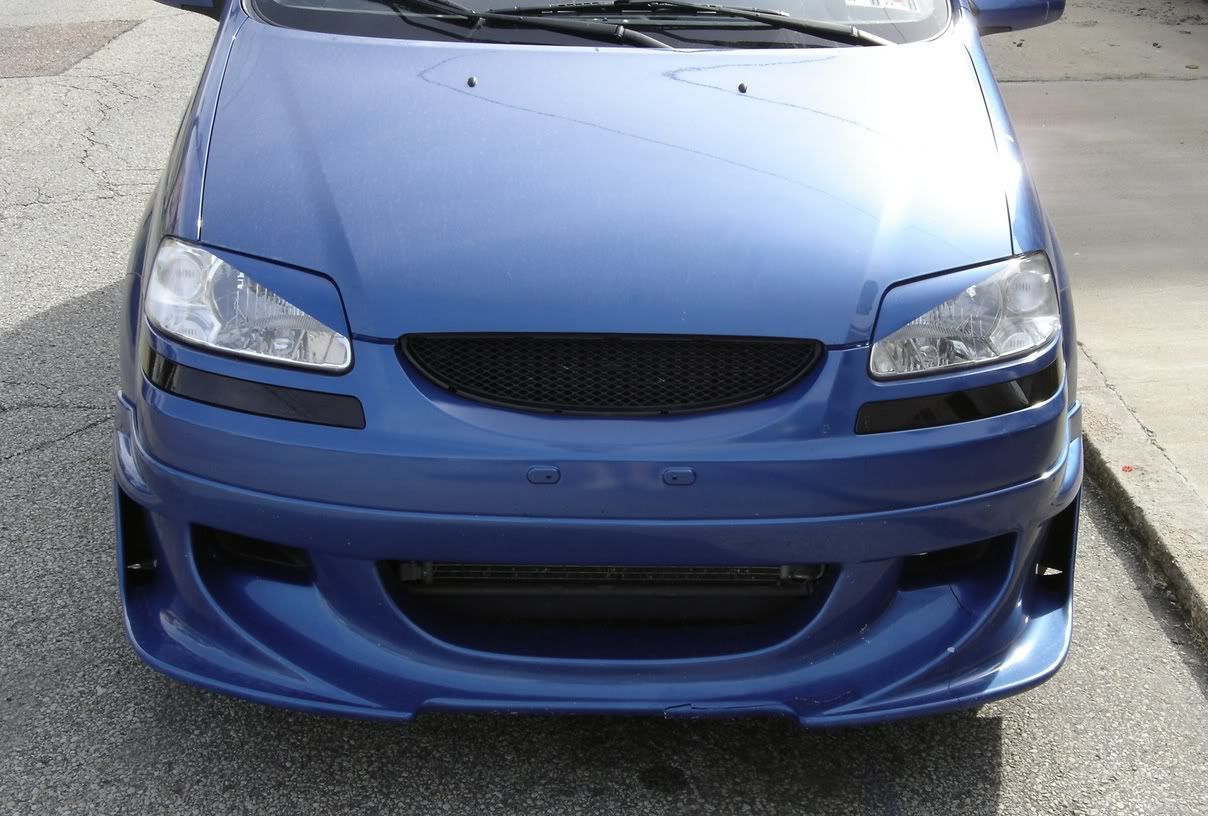
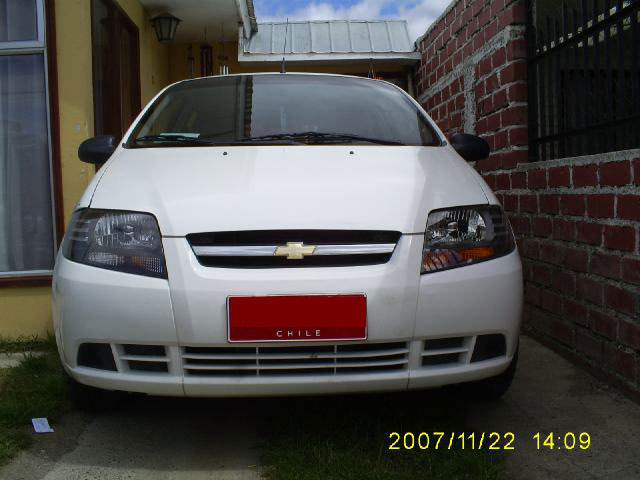
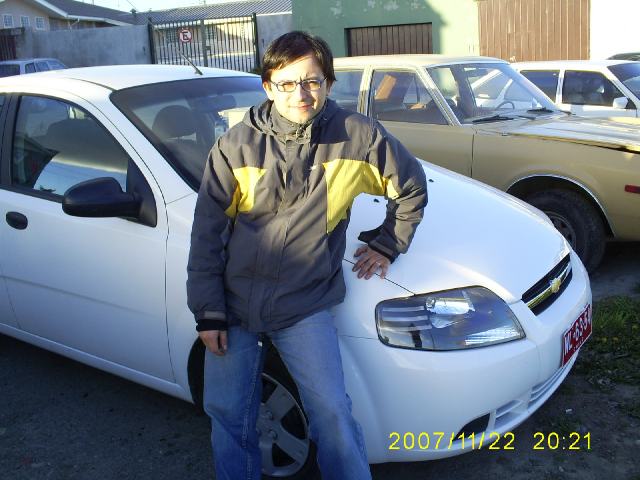
y otra fotito junto al mi aveo:
Image

from punta arenas CHILE
tomasparedesx@gmail.com

msn: djtopacho@hotmail.com

User avatar
Petrified.Rabbit
Posts: 1254
Joined: Sat Sep 12, 2009 12:08 am
Location: Pittsburgh

Re: FAQ

Postby Petrified.Rabbit » Sun Sep 13, 2009 10:52 pm

xstevex wrote:My project is finally done! After a change in plans with my other retro-fit, I finally have HID Projector Headlamps!

I'll get pictures of them on my car tomorrow along with the Beam shots and everything.

FX45 Projector
TSX Lens Mod
Philips 85122+ Bulbs

Special Credit to Josh from IZN TRBL (http://www.izntrbl.com for making my custom formed Bezels and Shroud! They are Awesome!

Image

Image

Image

Updates hopefully tomorrow, if it doesnt rain.


xstevex wrote:For the price... it all depends one what equipment you want to use....

You can get HID projectors anywhere from $50-$250 on Ebay (depending on Quality), and if you just want to use an HID Kit from ebay (D2R bulbs/Ballast/Wiring) that can be like $100 for the cheapest. ((But remember those probably wont last long!)) Then the Chromed shroud and Bezel is $120 from http://www.IZNTRBL.com (which is AWESOME).

So if you go the cheapest route possible you it will be roughly $270.

I would recommend using only OEM Equipment for their Longevity and preformance. The best ballast and bulbs are Philips. From HIDPLANET.COM you can get Brand new Philips Ballasts, Bulbs, Ballast Covers/Mounts, and Ballast Connectors for $379.99. Again that is Brand New, and there is always other places to shop around for the stuff. A lot of people even buy used Equipment to save money. Used OEM stuff is atleast 80% of the time still really good stuff and will last you a good amound of time.

For a Time for the build....
plan on 1 day to mount the projectors
Josh can vacuum form the shrouds in one day and ship them to the chromer the very next day. The chromer is pretty quick about getting things done. so from the time you ship to the time you get it back will probably be about 3 weeks.

But you can also make your own shroud and bezels using various materials and products anywhere from a $2.00 Oven Drip Pan with a $2.00 Ace Hardware Flange. If you go this route you can have the whole thing done in two days.

The possibilities are endless!

Check out this forum for all the info you need to know!
http://www.hidplanet.com/forums

Ask any questions you wish about HID, I can most likely answer them.


xstevex wrote:I could build something like this....

If you want an all chrome oem look:
Image

If you want a blacked out look:
Image
That would be the shroud and the rest of the housing could be black.

I could make these headlamps in 2 days. It would look preety good.

User avatar
Petrified.Rabbit
Posts: 1254
Joined: Sat Sep 12, 2009 12:08 am
Location: Pittsburgh

Re: FAQ

Postby Petrified.Rabbit » Sun Sep 13, 2009 11:21 pm

ChevroletRyan wrote:Originally posted by aveoike

All you have to do is, unplug the wiring harness from the module with the white sticker on it. Its labeled and is upside down. And is right above the gas pedal.
Image


for O8 up sedan, and 09 up Hatchbacks all you need to do is pull the fuse on the fuse block on the side of the dash, in the door jamb area

User avatar
Petrified.Rabbit
Posts: 1254
Joined: Sat Sep 12, 2009 12:08 am
Location: Pittsburgh

Re: FAQ

Postby Petrified.Rabbit » Sun Sep 13, 2009 11:25 pm

exodus wrote:Image
Image
Image
Image
Image
Image
Image
Image
Image
Image
Image
Image
Image
Image
Image
Image
Image
Image
Image
Image
Image
Image
Image
Image
Image

User avatar
Petrified.Rabbit
Posts: 1254
Joined: Sat Sep 12, 2009 12:08 am
Location: Pittsburgh

Re: FAQ

Postby Petrified.Rabbit » Sun Sep 13, 2009 11:27 pm

How To Remove Emblems or De-Badge Your Car:
#1 Find a hair drier and warm the badge
#2 While emblem is still warm use some dental floss or thin string and see-saw it between the badge and your car until it comes off. You can also pry them off with a plastic putty knife, just wrap it in a layer of duct tape to keep from scratching your car.
#3 Pull the emblem off, but try to keep as much of the glue on the badge as possible in case later you want to put them back on. If so, simply re-heat the badge and apply it to the car.
#4 Clean the area with rubbing alcohol and polish it.
If you remove the rear bow-tie badge there will be 2 holes underneath it in your hatch or trunk with black rubber stoppers in them. Keep that in mind.

User avatar
Petrified.Rabbit
Posts: 1254
Joined: Sat Sep 12, 2009 12:08 am
Location: Pittsburgh

Re: FAQ

Postby Petrified.Rabbit » Sun Sep 13, 2009 11:31 pm

jimig1 wrote:Here you go i found the pics and I'm hosting them on my site so they should stay up

while I was installing my new side marker lights i thought i would take a few pics so everyone can see how i did it

the first thing i did was to take some duct tape and wrap it around the light
Image
Image
Image
Image


then making kind of a handle
Image

then just have to slide it to the left and pull it out
Image
Image

then disconnect the wire and plug in the new light
Image
Image

and pop the light back in
Image

and your all done hope this helps some one out


Return to “Exterior”

Who is online

Users browsing this forum: No registered users and 1 guest