
 LinkBack URL
 About LinkBacks


 Home on Wheels ...
"I am having a heck of time with my rear drums."
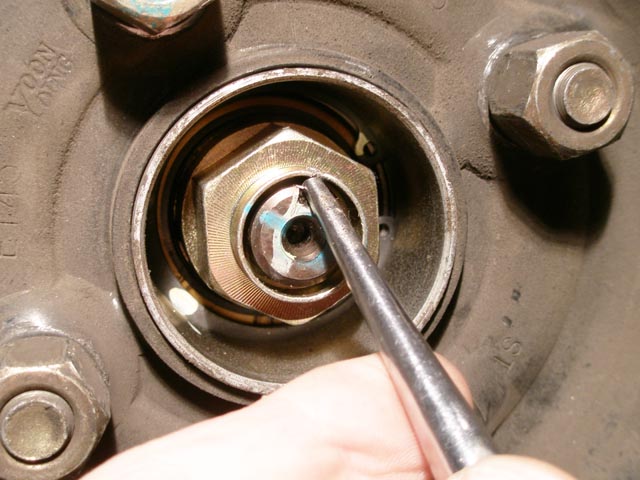
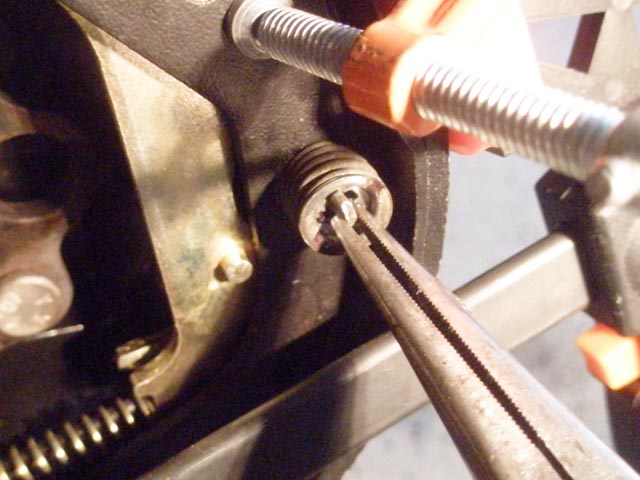
I hear ya. First, remove the center nut [32 mm, or 1 1/4"]. Un-dimple the rim on the nut before breaking it loose.

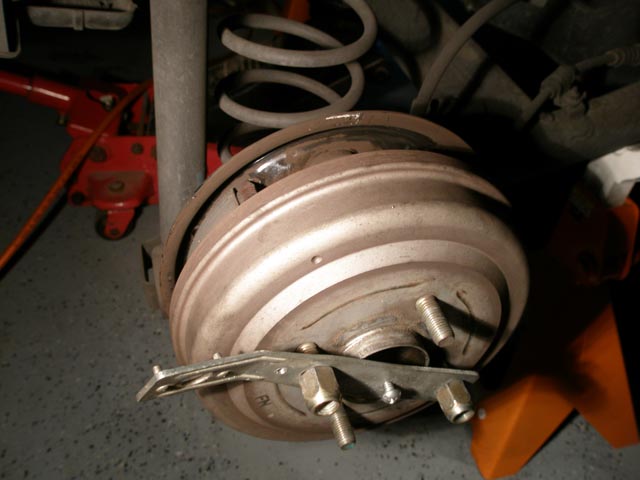
The drum can then be slid off, but if the shoes have worn considerably into the drum, causing a lip at the rear of the drum, it may be difficult to remove. Wiggling helps, but I had one drum that was grooved considerably, due to driving for awhile metal to metal [squaaawk ...], so I devised a simple puller (above). It was still a struggle!
You can see the grooves and the loose particles. It was considerably oversize, so I had to replace it.
The other drum was OK to reuse, since ID is still under 201 mm ID [max allowed]. If I had it turned though, It might have gone over that dimension. Didn't machine the inside since it was smooth and concentric enough, in my opinion. Some reuse an oversized drum, assuming it's only slightly O/S, but you do so at your own risk ...
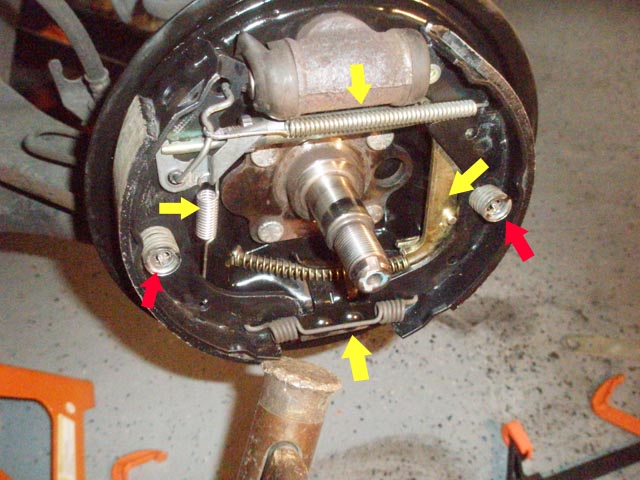


Driver side. Top yellow arrow [horizontal spring] remove with visegrip, since extremely stiff, and might require a little help to remove. Notice I've clamped the shoes together with a bar clamp from Harbor Freight. Not really necessary, but at least I finally found a use for one! Then remove the vertical one that operates the ratcheting device for adjusting the shoe clearance initially. Then the stubby ones that hold the shows against the back plate. One technique is hold the shaft with a needle nose pliers, then rotate the disk behind it. There are tools made for that purpose, but this way works.
The right hand yellow arrow points to the plate that the parking brake cable is attached to. It comes out of its hole when you remove the old shoes. Bottom spring comes off easily with the two shoes, and reattaches to the new ones. When putting the new ones in place, you can use a couple small 'C' Clamps to hold them prior to attaching them to the back plate with the stubby ones [red arrows]. Then reassemble the ratcheting clip and threaded adjuster, then the other two springs.
Clean everything, spray with a light brake lube or silicone spray, and then reassemble.
Everything is the same on the passenger side, but reversed. Best to do one side at a time to avoid mixing things up, in particular, the threaded rod that ratchets outward to achieve the proper clearance. Reason being, that on the right side, it is a left-hand thread, while on the driver side, it's a right handed thread. If switched, the ratcheting will widen the gap rather than to set it properly.

Make sure the threaded cylinder turns easily, or clean the threads and lightly lube.
I tweaked the adjuster length to get a dimension that was just under the 200 mm of the drum, but if you don't have an 8" digital caliper to measure it with [again, Harbor Freight], you can do it by feel. Theoretically, the shoes could be fully retracted [minimum extension], and the ratchet would bring them to the proper spacing. But I preferred assembling it with a close fit to begin with.
When you put the nut back on, they say 140 - 150 ft/lb tension is required, but if you tightened then fairly hard with a breaker bar rather than a small ratchet handle, should be fine. Then re-indent the rim of the nut.
Hope this helps!
Get it done by Sunday nite ...


 Reply With Quote